Skills: Active Directory, Account creation, Organization Units, RSAT Tools
In this post, I will be going over the set up of our “Help Desk” client that will be used as an admin computer other than our server. It will be used to emulate a help desk work environment and will allow us to use Active Directory tools from our server to manage and access our standard user computer. I will cover creating a help desk account and organizational units that will help organize our accounts into help desk/admin accounts and user accounts. We will install RSAT (Remote Server Administrative Tools) tools to our help desk computer, which will allow us access to server manager and Active Directory admin tools, and we will enable the recycle bin on Active Directory to allow us to restore any files we may delete on accident. To start, we need to create an additional client computer that will function as our help desk computer, you can follow the same set up from my last post but just name the computer “HELPDESK” rather than “CLIENT1”.
Creating a Help Desk Account
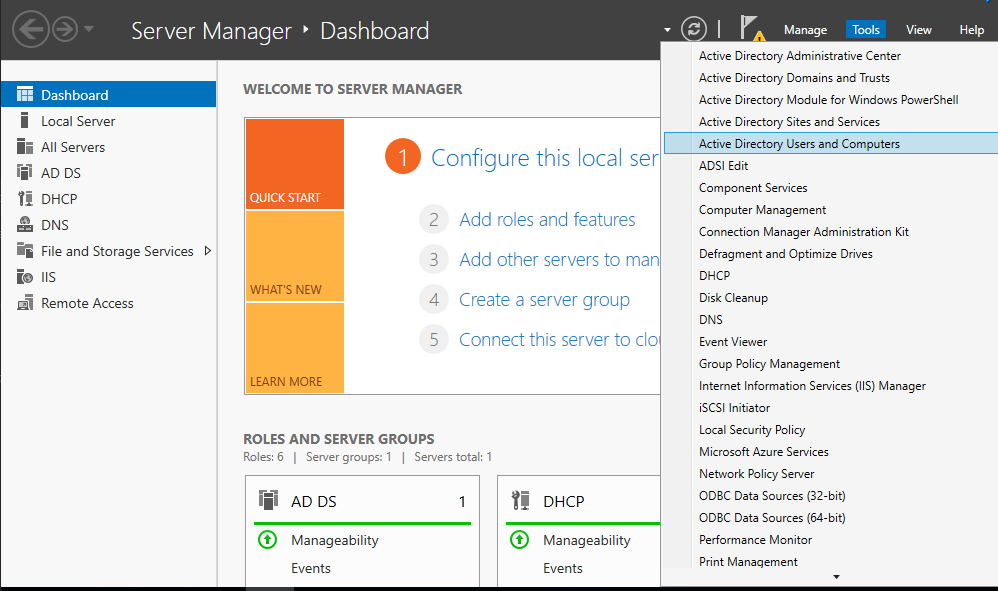
To create a help create a help desk account in this lab, we will be taking an easy route by just duplicating the Administrator account on Active Directory and renaming it. This will give us all the same administrative rights as the default admin. This will likely be different in a work setting because there will be limited rights to a help desk account but for our purposes we are going to give ourselves full administrative rights. Start by going to your server and opening Active Directory Users and Computers. You can do this from Server Manager-Tools-Active Directory Users and Computers or by finding it in the start menu.
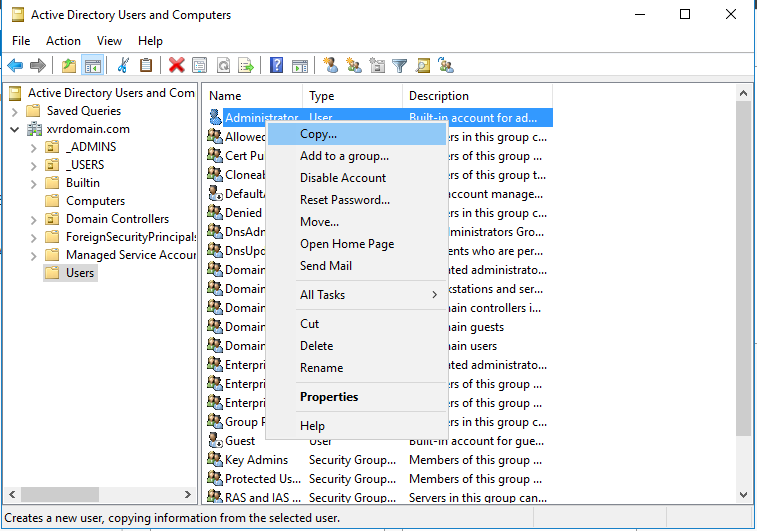
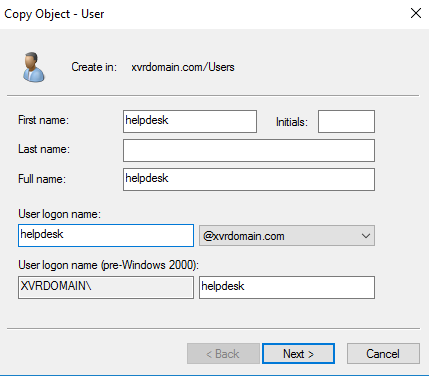
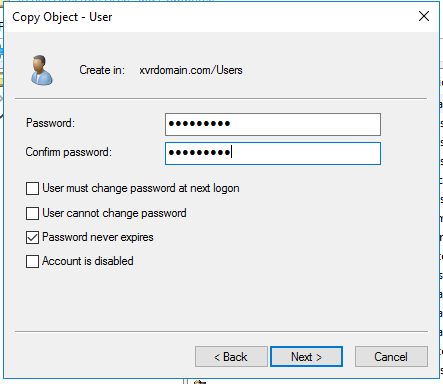
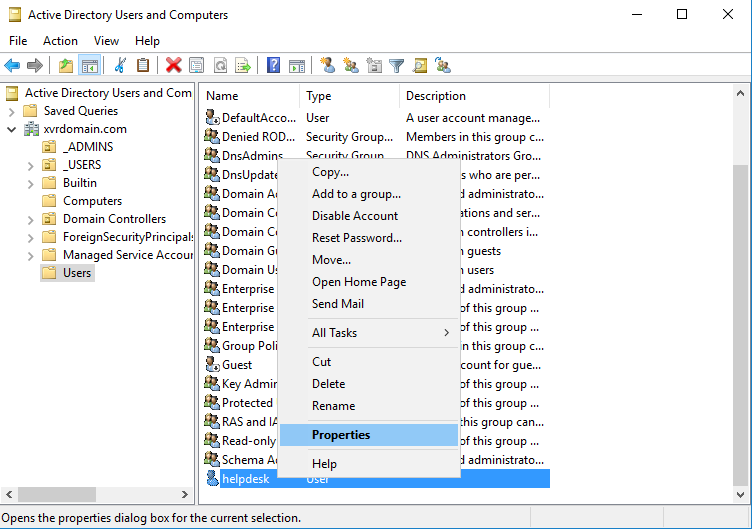
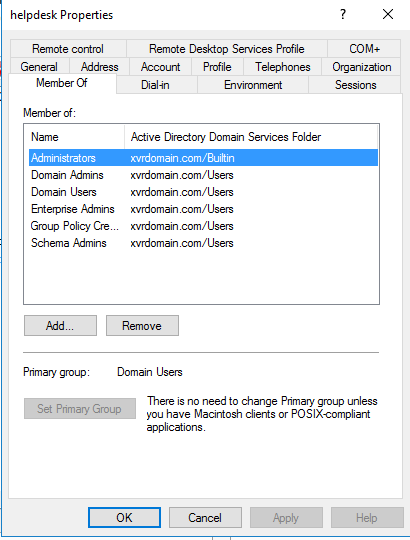
In Active Directory User and Computers, click to drop down the sub-menus of your domain. Then find and click the folder called “Users”. Once in the Users folder, right click the user “Administrator” and select “Copy…”. This will open a copy object dialogue. Enter “helpdesk” as the first name and click next.You will then be prompted to create a password. Only select “Password never expires” and enter your password. I am using “Password1” for all of my accounts in this lab. Once your password is entered and confirmed, select next. You can verify the admin rights by finding the user in the Users folder, right-clicking, and selecting “Properties”. Select the “Member of” tab and you can see that the account is a member of several admin groups which allow administrative rights of the domain.
Creating Organization Units
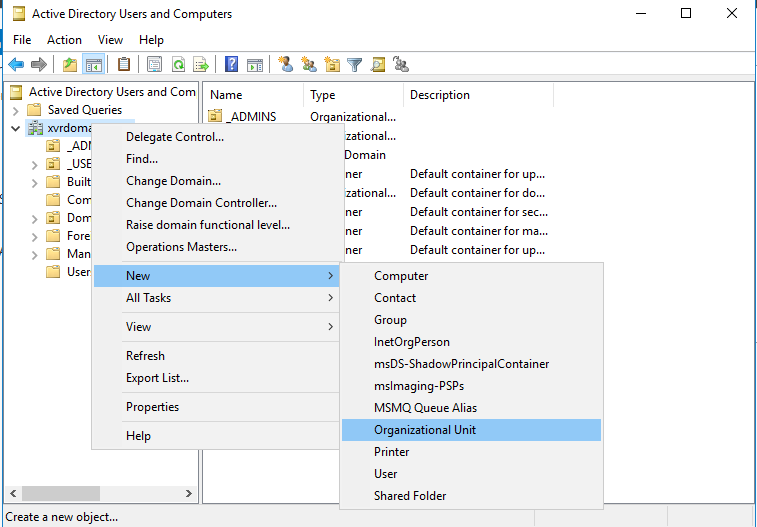
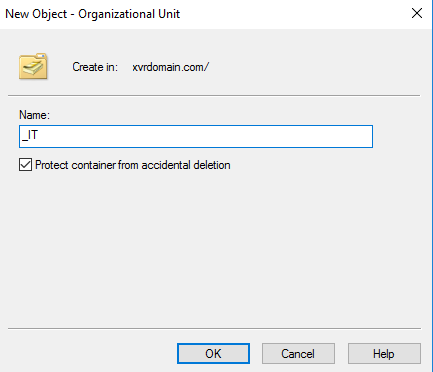
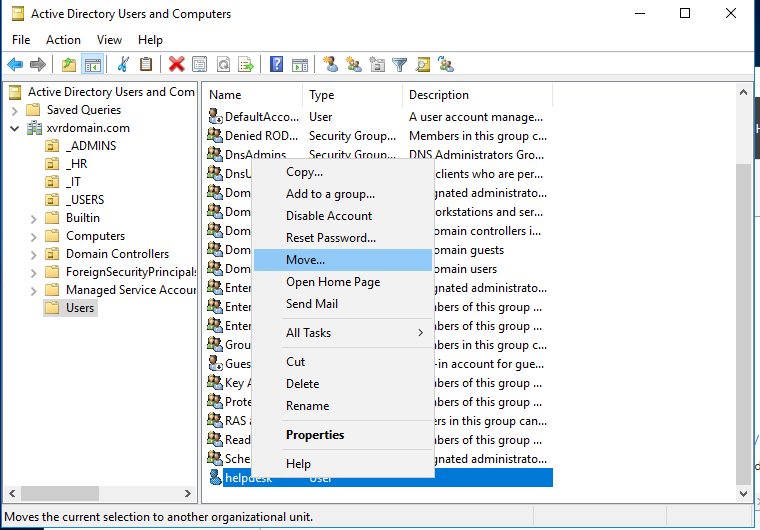
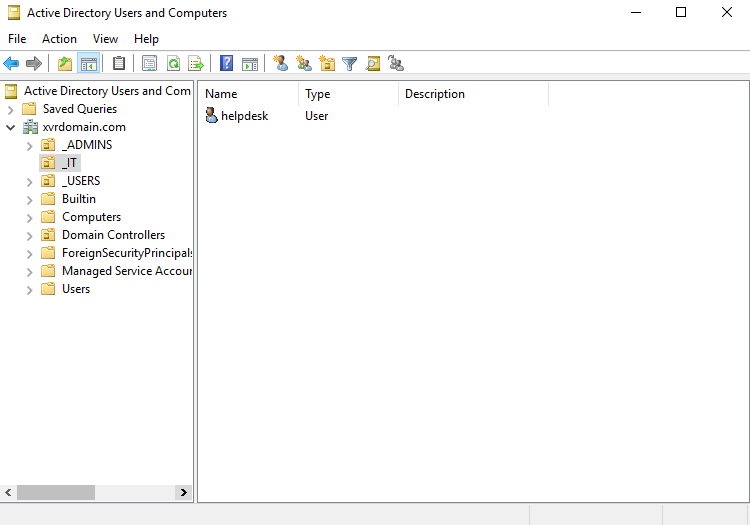
Organization Units or OUs are like folders in Active Directory to help organize and manage accounts. For example, you can organize accounts by departments or regions within a company to help better keep track of various accounts. To start for this lab, I am going to create an OU for the “IT department” and add the helpdesk account to the OU. To create a new OU, right-click on your domain name in Active Directory Users and Computers, and select new-organization unit. You will be prompted now to name the OU, in my case I name the OU “_IT”. I am using the underscore just so that all of my OUs for the lab will show up on the top of the OU lists. Now we can move our help desk account to the new OU. Find the helpdesk account in the Users folder. Right-click on the account and select move-_IT. We can go back to Active Directory Users and Computers, select the OU “_IT” and we can see verify that the account was moved to the new OU.
Enable Recycle Bin
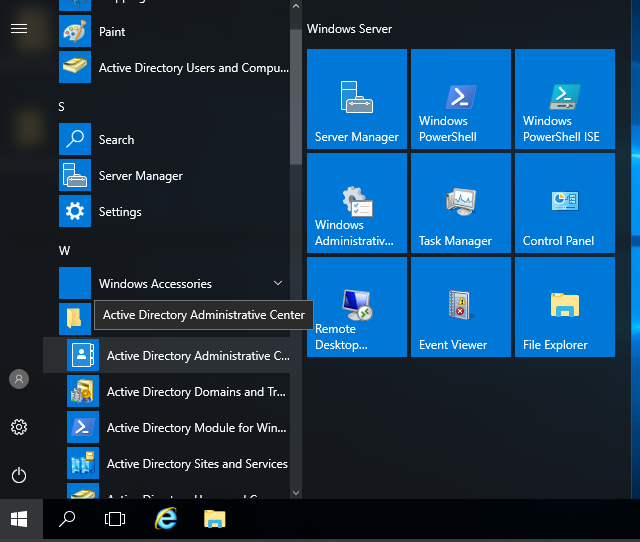
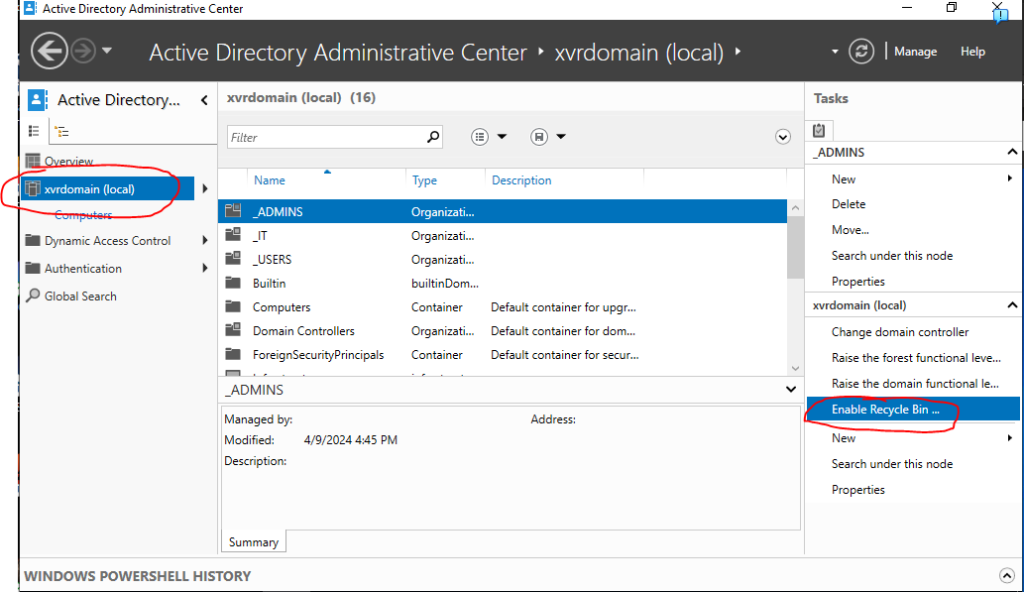
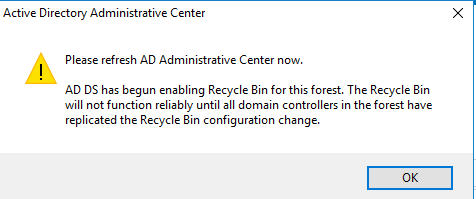
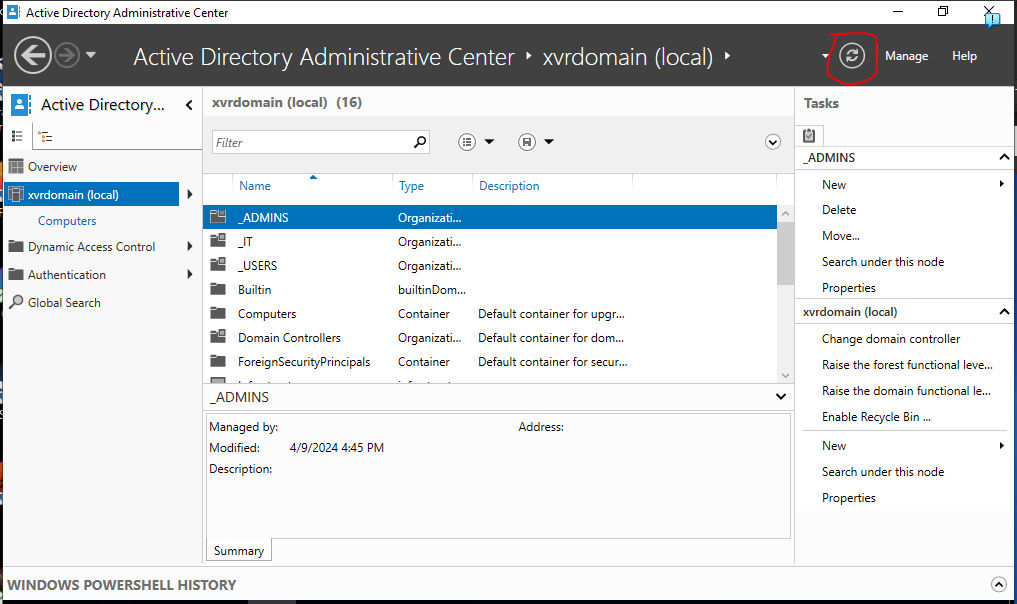
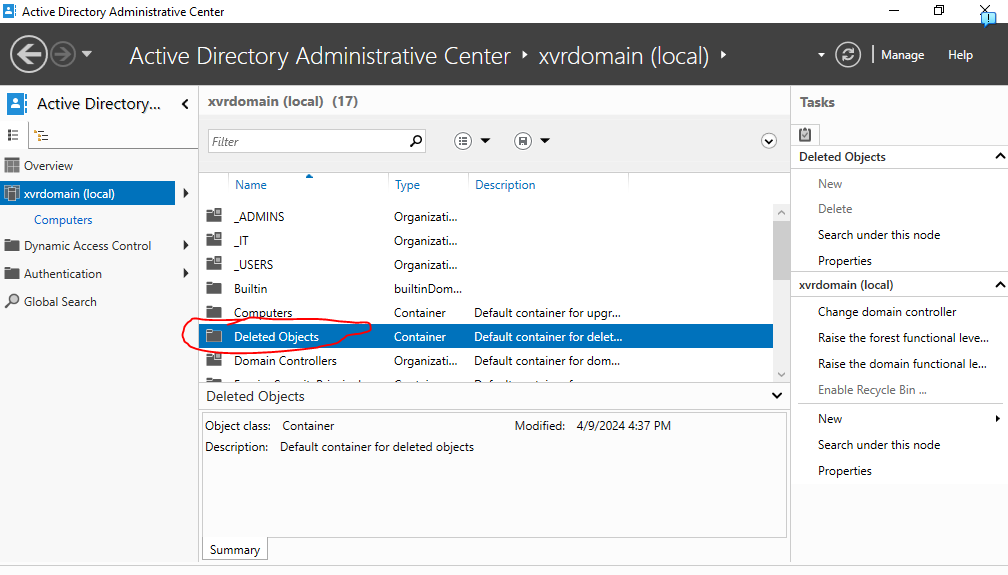
Before moving on and logging in with our help desk account, I want to enable the recycle bin in Active Directory. It is not enabled by default so if you accidentally delete something, access it will be difficult. To enable the recycle bin, open the Start Menu on your server and find Active Directory Administrative Center. From the Administrative Center, select your domain on the left panel and on the right hand side select “Enable Recycle Bin”. You will get a couple of warning about enabling recycling bin, just select OK on them. One is just letting you know that you can’t disable the recycle bin, and the other is telling you to refresh in the administrative center, which we are about to do. You might have to wait for a moment for this to process and verify the recycle bin is enabled. On the top right of the administrative center, select the refresh icon and keep refreshing until you see the folder titled “Deleted Objects” to verify the recycle bin is enabled.

Install RSAT Tools
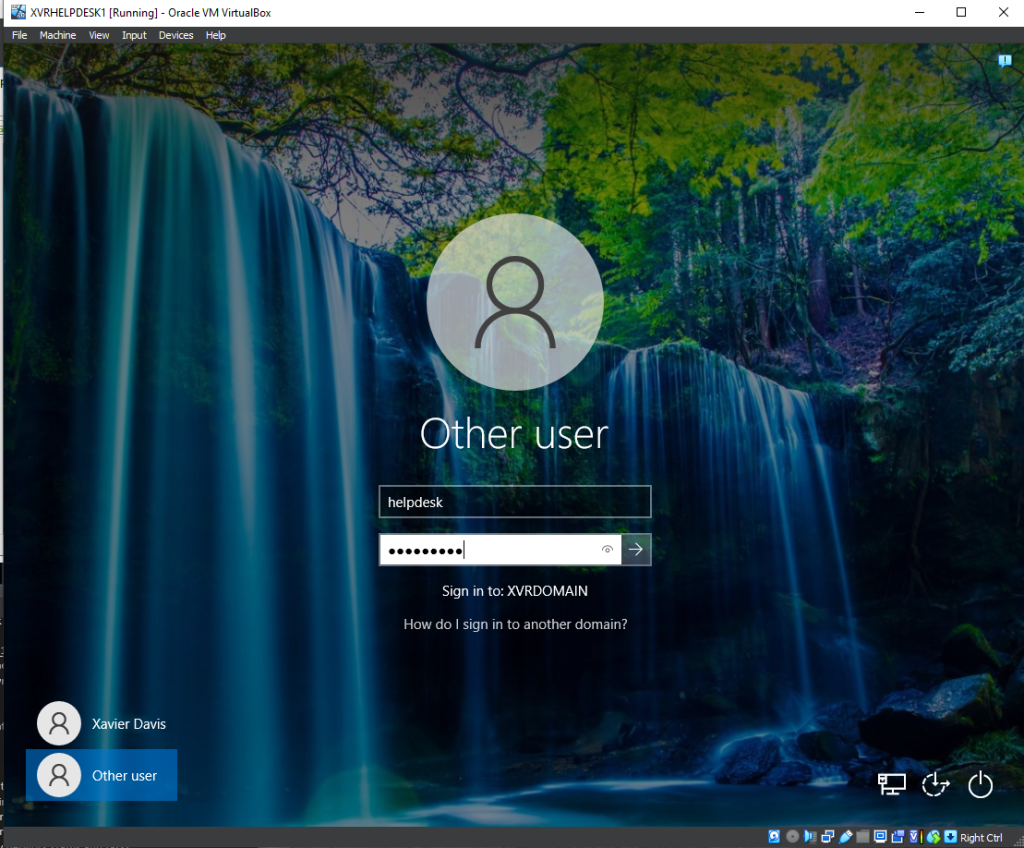
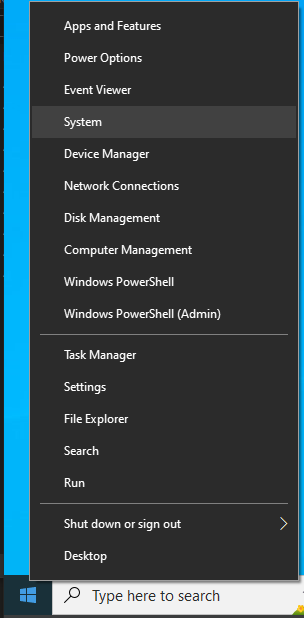
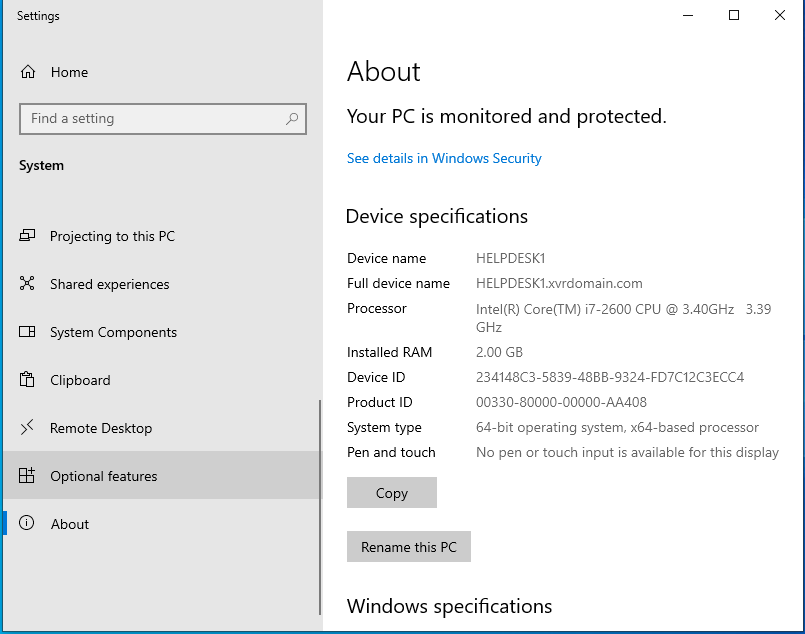
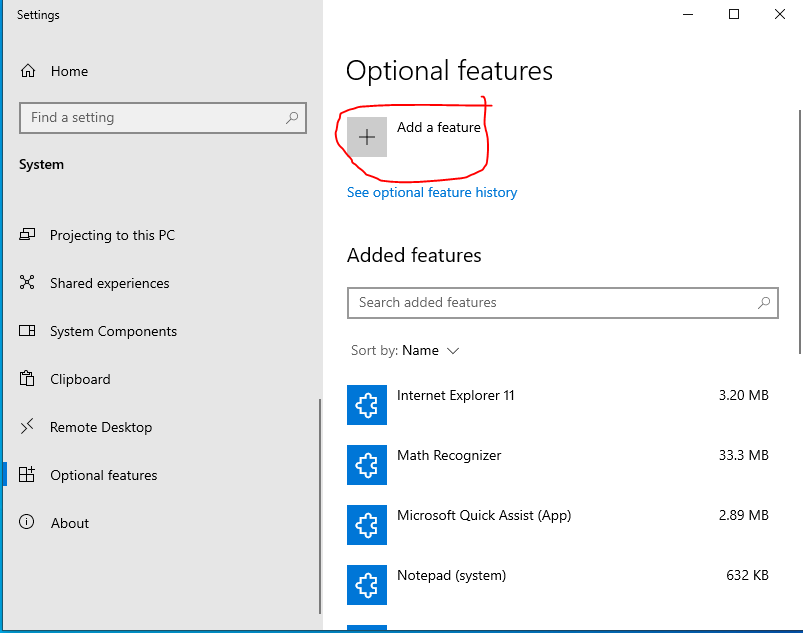
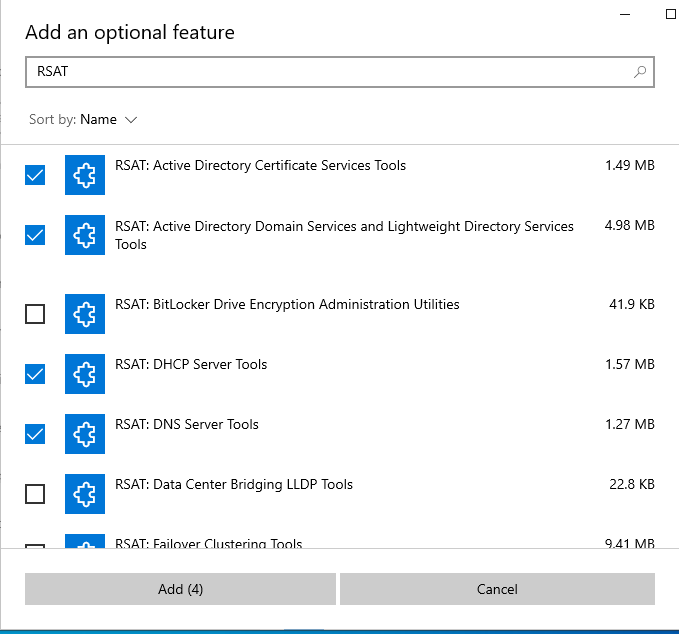
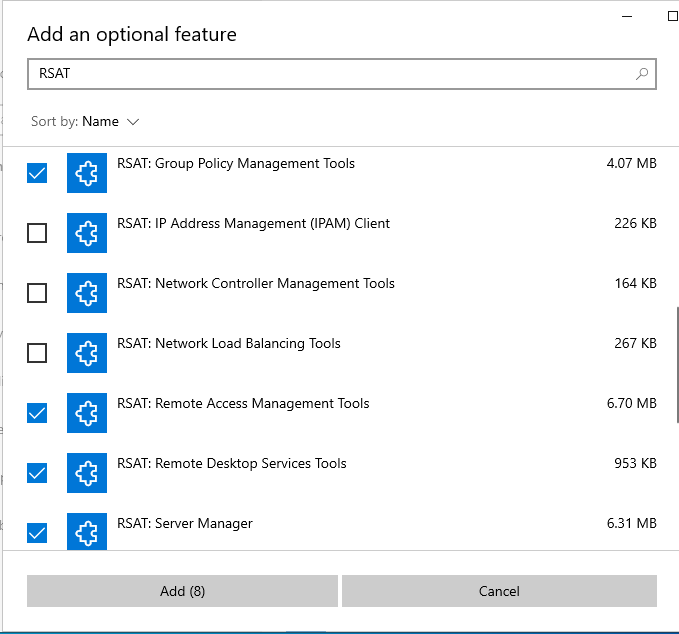
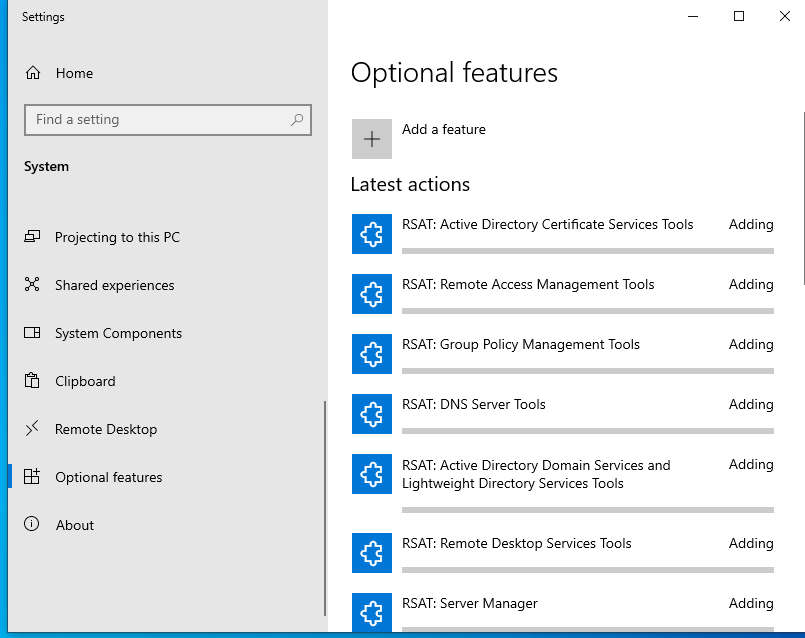
We are now going to login with our new help desk account to the help desk computer and install RSAT Tools to allow Active Directory administration from our help desk computer. From the log in menu, select “Other user” and enter your help desk account login. It should say “Sign in to: DOMAINNAME” under the password box if you are correctly joined to the domain. You should be if you followed my last post about creating a client computer. Once everything is loaded up, we can install RSAT tools. Since we gave our help desk account administrative rights, we should be able to install without any issue. Optionally, you could do this step first by using our Active Directory account we created in an earlier post. To install RSAT Tools, right-click the Start menu and select System. This will open up the Settings-System page. Scroll down on the left hand toolbar until you find “Optional Features”. Once in Optional Features, select “Add a feature”. From here you can select the features you want to install. In the search bar, type “RSAT” to narrow down your options. For this lab, I will install:
- RSAT: Active Directory Certificate Services Tools
- RSAT: Active Directory Domain Services and Lightweight Directory Services Tools
- RSAT: DHCP Server Tools
- RSAT: DNS Server Tools
- RSAT: Group Policy Management Tools
- RSAT: Remote Access Management Tools
- RSAT: Remote Desktop Services Tools
- RSAT: Server Manager
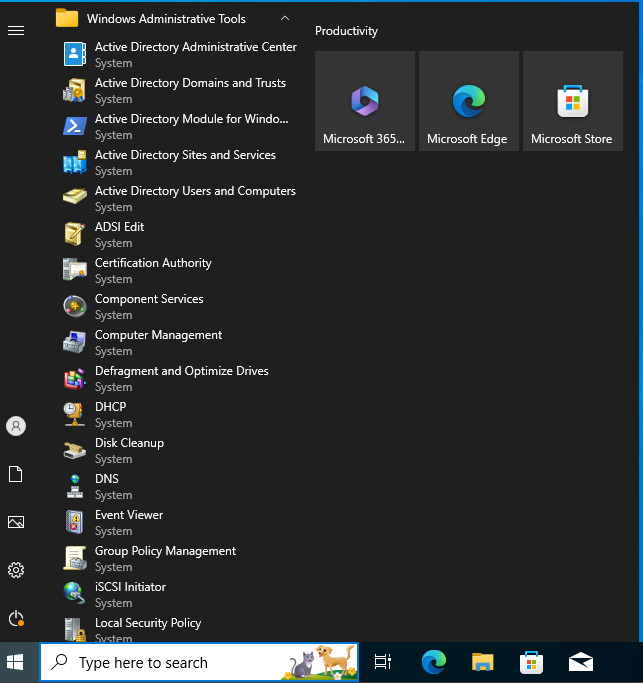
You likely wouldn’t have all these tools at level 1 help desk or have to go through installing them, but I want to have all of these for my homelab. Next, just select install and wait. It may take quite some time. Once installed you can verify the installation from the Start Menu-Windows Administrative Tools.
Final Thoughts
Now that we have a hep desk computer with RSAT tools installed and a help desk account with administrative rights, we can start using the help desk computer to use and manage Active Directory. Having the tools we installed, we can start doing several administrative tasks such as creating user, assigning group policy, and setting up share drives. I did this using the help desk computer to make it seem more like a real environment in which you would be using your own desktop rather than doing all the management directly from the server. We can start seeing how Active Directory works and how the server and client computers interact from both the perspective of an administrator and a standard user. In the next post, I will dive into some basic administrative tasks you can do from the help desk account such as creating user accounts, unlocking/locking accounts, resetting passwords, and group policy. I hope you enjoyed and I look forward to showing you more of my IT career journey!

Leave a Reply