Skills: Active Directory, Administration, Help Desk, Account Creation, Organizational Units
In the last post, I created a help desk account and an organizational unit for an “IT” department. In addition, I installed RSAT Tools on the help desk computer to allow remote administration of Active Directory. In this post, we will log in to our help desk account and create new Active Directory users that we will use to log into our client desktop. We will organize those accounts into organizational units, search for those accounts, and reset passwords for the accounts. To get started, open up the help desk computer we created and installed RSAT tools on from the last post. We also want to make sure our server is up and running to allow us to log-in to Active Directory.
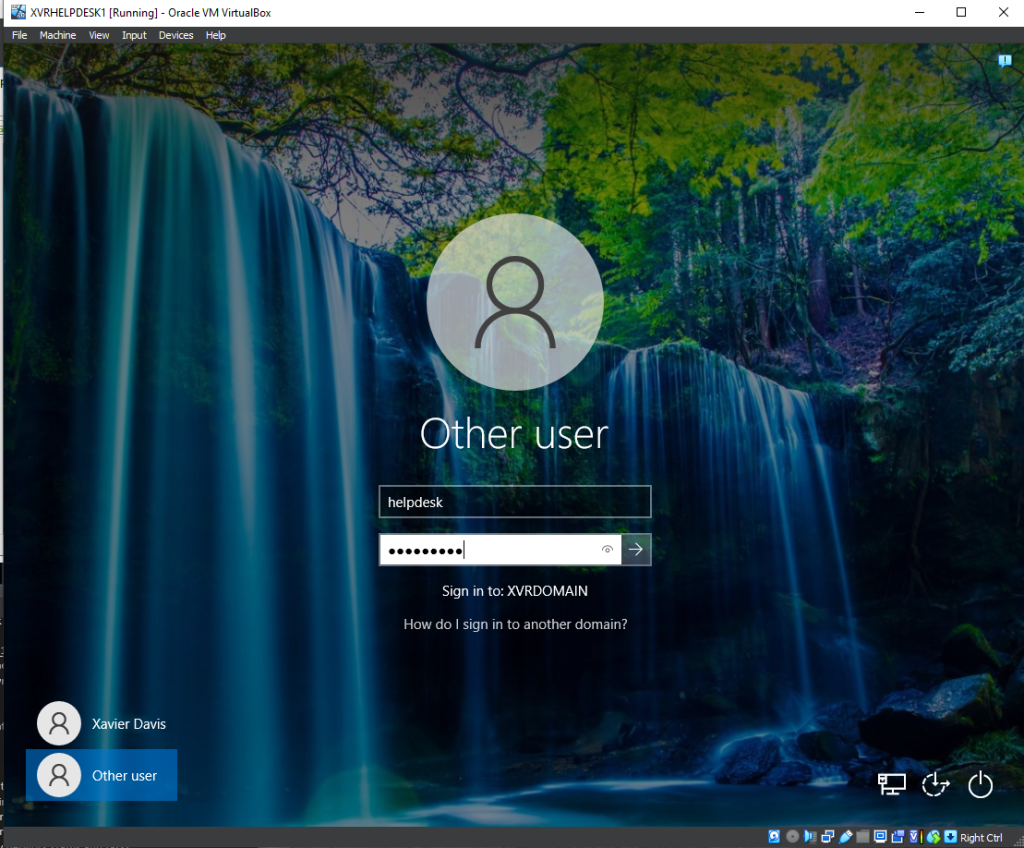
Creating User Accounts and Organizational Units
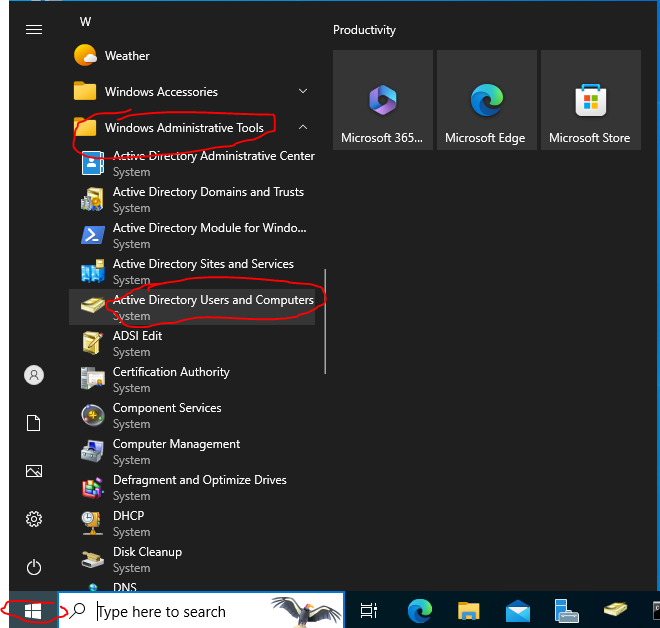
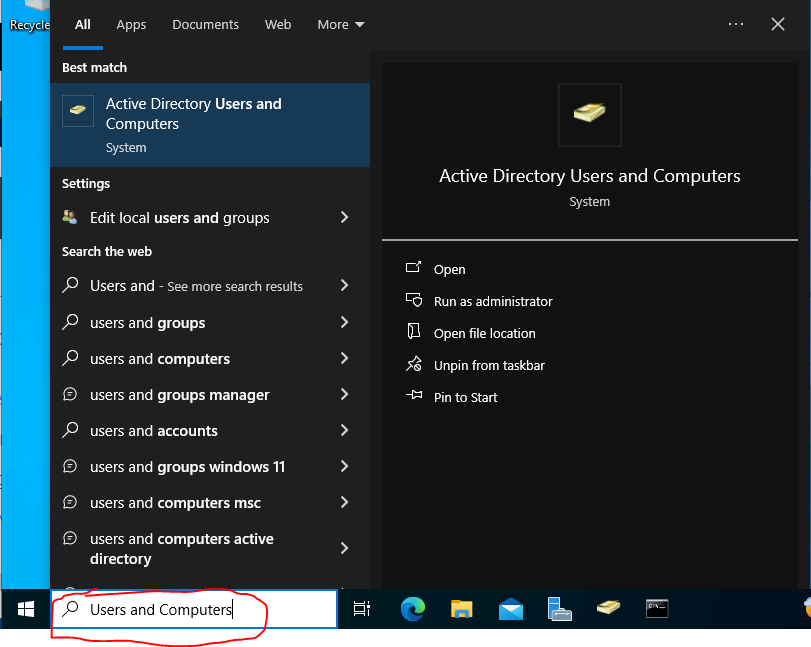
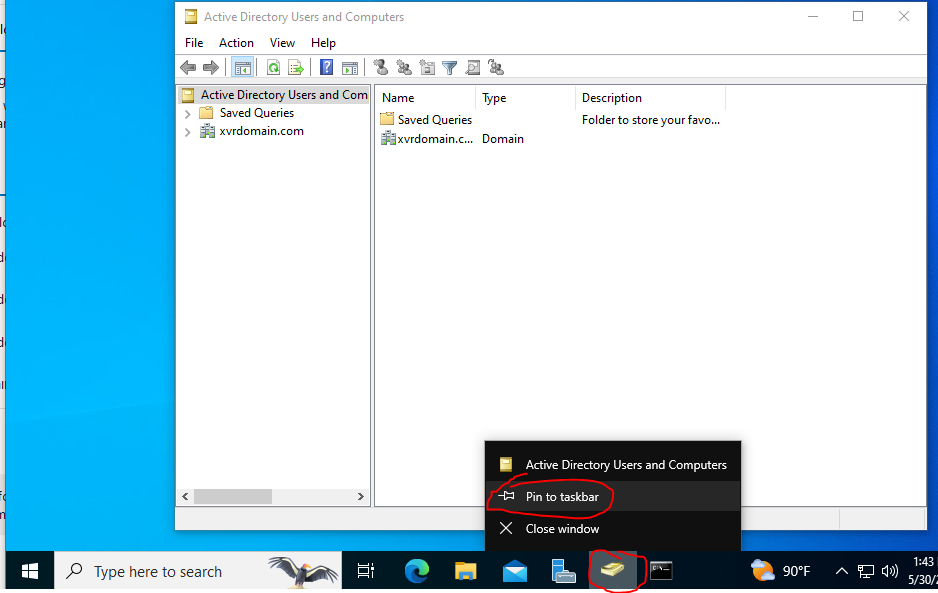
To create user accounts in Active Directory, we need to access Active Directory Users and Computers. There are a couple ways to open this tool. We can either access it in the Start Menu by finding Windows Administrative Tools and clicking the icon for Active Directory Users and Computers or we can access it from Server Manager Tools. On a help desk computer at work you may not have access to Server Manager but we installed in in the last post. Unlike when using the server, Server Manager won’t start automatically on our help desk computer. You can access Server Manager in the Start Menu or using the search bar (you can also use the search bar to access most of these tools). Active Directory Users and Accounts will be a tool that we will use frequently, so to save time and to improve workflow, we can pin the application to our taskbar. Once Active Directory Users and Computers is open, right click the icon on the taskbar and select “Pin to taskbar”. Now the icon will always be readily available on our taskbar for easy access.
Creating the First User
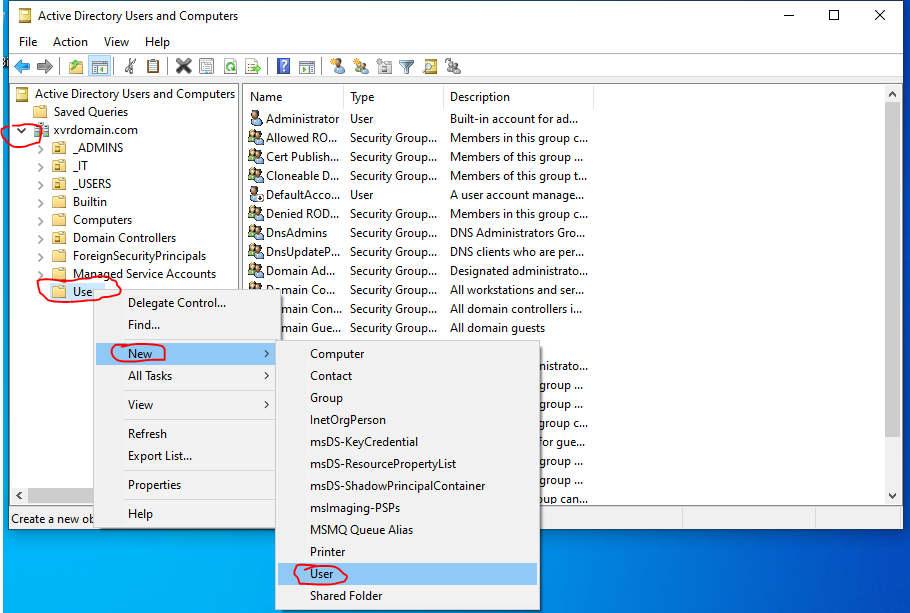
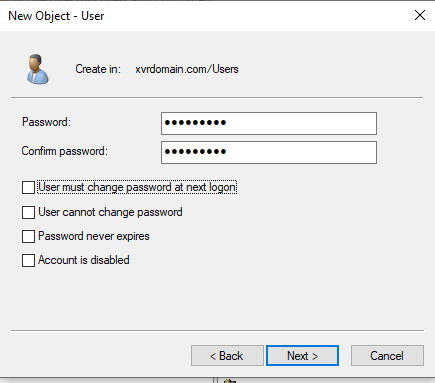
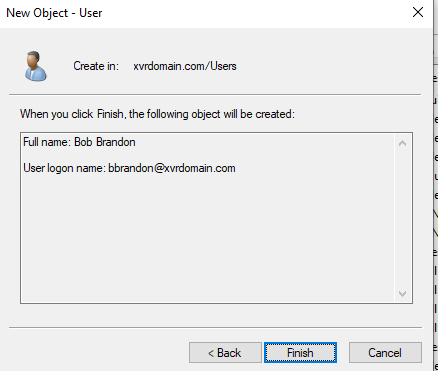
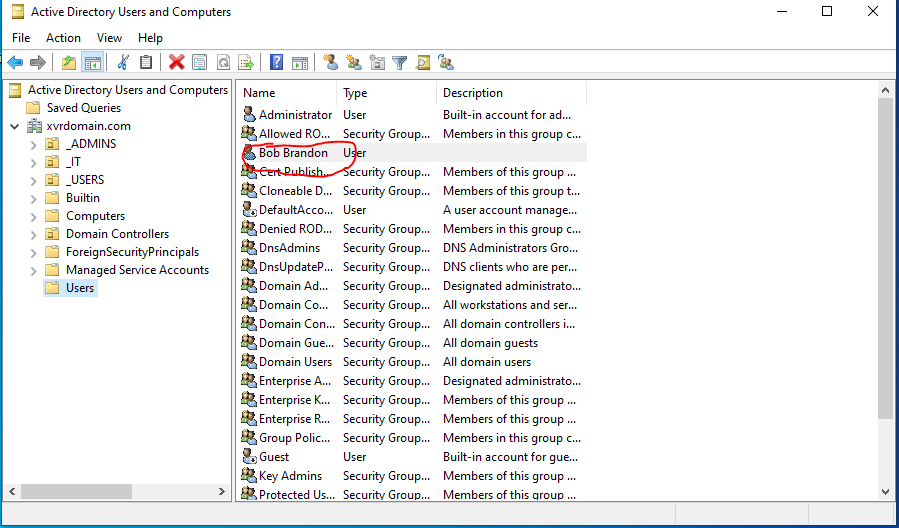
I’m going to mix a couple of steps here to get the final result, but what we will end up doing is creating two user accounts and two organizational units. I will show you a couple of ways to add users to a the OUs just to see a couple of options. Lets start by creating our first account. In Active Directory Users and Computers, click the arrow near you domain name to open the drop down menu. From here, select the users folder then right-click the users folder and select New-User. Next we can enter the users’ first and last name (I just used by dogs name, Bob Brandon, for fun). I am sticking with the naming convention that I used from a previous post for the login name, which is first initial and last name (bbrandon). Next we can enter a password and uncheck “User must change password at next login”. I am sticking with the same password that I’ve been using for all of this lab (Password1). Click next, and then confirm the info on the next page and select finish. Now we can see in the “Users” folder that there is a new account for Bob Brandon.

Creating an Organizational Unit
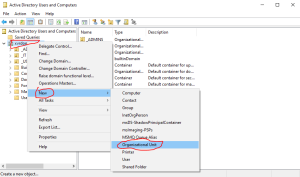
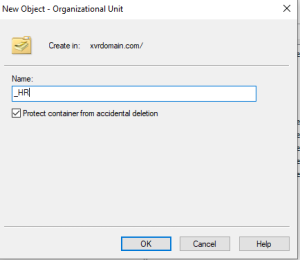
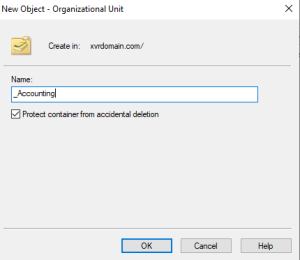
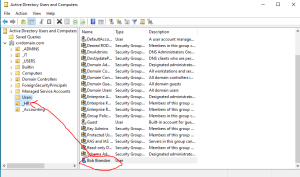
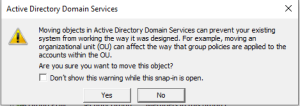
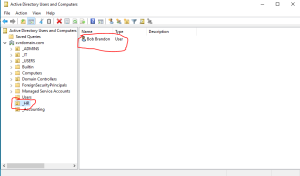
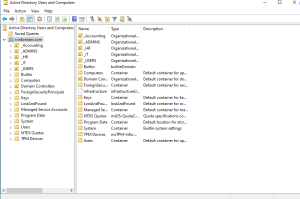
To create an organization unit, right-click your domain name (still in Users and Computers) and select New-Organizational Unit. Now you will be prompted to name the new OU. I did this process twice to create two different OUs, one named “_HR” and one names “_Accounting”. These are representing different parts of an organization and we can organize accounts by departments which will allow us a lot of cool options that we can do later to manage these groups. Now we can add users to these OUs. For the first one, I went back to the Users folder and found the user “Bob Brandon” and clicked and dragged the user into the HR folder. You will be prompted by a warning after dragging the user, since it is a brand new account we can click yes and not have to worry about breaking anything. Then we can click on the HR folder and verify that our account has been moved into the HR folder.
Creating a second user directly in OU
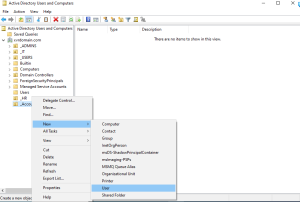
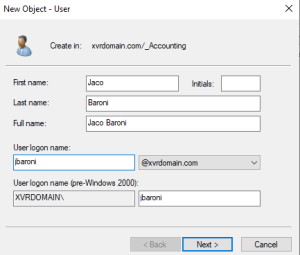
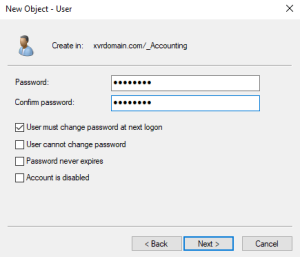
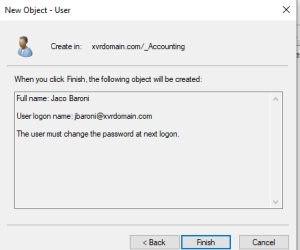
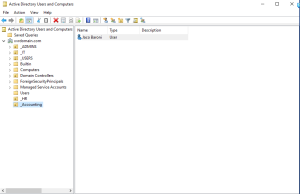
For the next user, I created the account directly in the OU. To do this, select the OU in Users and Computers, in this case “_Accounting”. Right click the folder and select New-User. Following the same steps as with the last user, enter the account name. I’m doing the password creation a little bit different for this one so I can demonstrate a couple of things in a moment. Enter the password for the user and this time leave the box checked that says “User must change password at next login”. Then click next and finish on the next page. Now we can see that our new user (Jaco Baroni) is in the “_Accounting” OU.
Searching for Accounts, Enabling Advanced Features View, and User Properties
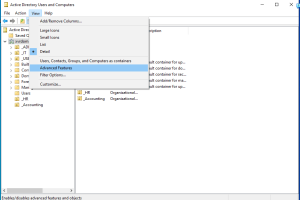
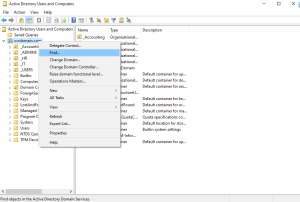
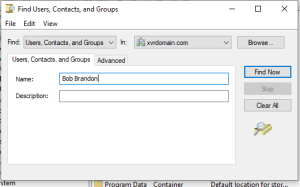
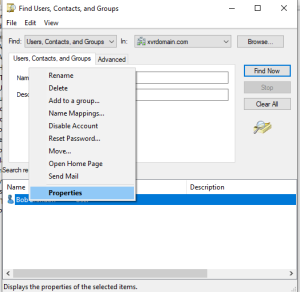
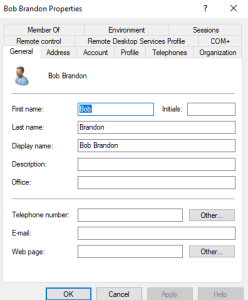
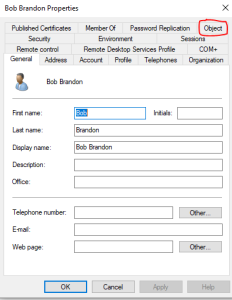
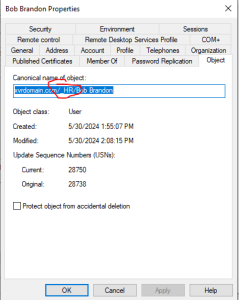
Now what I want to do is imagine a scenario in which we don’t know which OU the user is a part of so we would need to search for the user to find out more details about the user. To start, we are going to enable the “Advanced Features” in Users and Computers. To do this, select view at the top drop-down menus of Users and Computer and select “Advanced Features. Once enabled, you can see that a bunch of new folders/OUs appear under our domain. We aren’t going to worry about those for now. To see what we enable Advanced Features for, look at the picture captioned “Before Properties” and compare it to “After Properties”. We can see some new tabs in the users properties window and in particular we are going to use the tab titled “Object”. I’ll get to that in a second. First we are going to search for one of the users we just created so we can find out which OU it belongs to. Right-click on the domain name and select “Find”. This will bring up a search option. Enter the name of the either user that was just created (I searched for Bob Brandon) and click “Find Now”. The user will pop up below. Right-click on the user and select “Properties”. Once in the properties window, find the tab title “Object” and click on it. We can see here the file path of this user and located in the center of the file path is the OU that it belongs to. This is helpful if you don’t know which OU that the user belonged to. In a later post, we will come back to this file path when creating shared drives so don’t forget how to find it!

Resetting user password
Logging in on new user account and changing user password
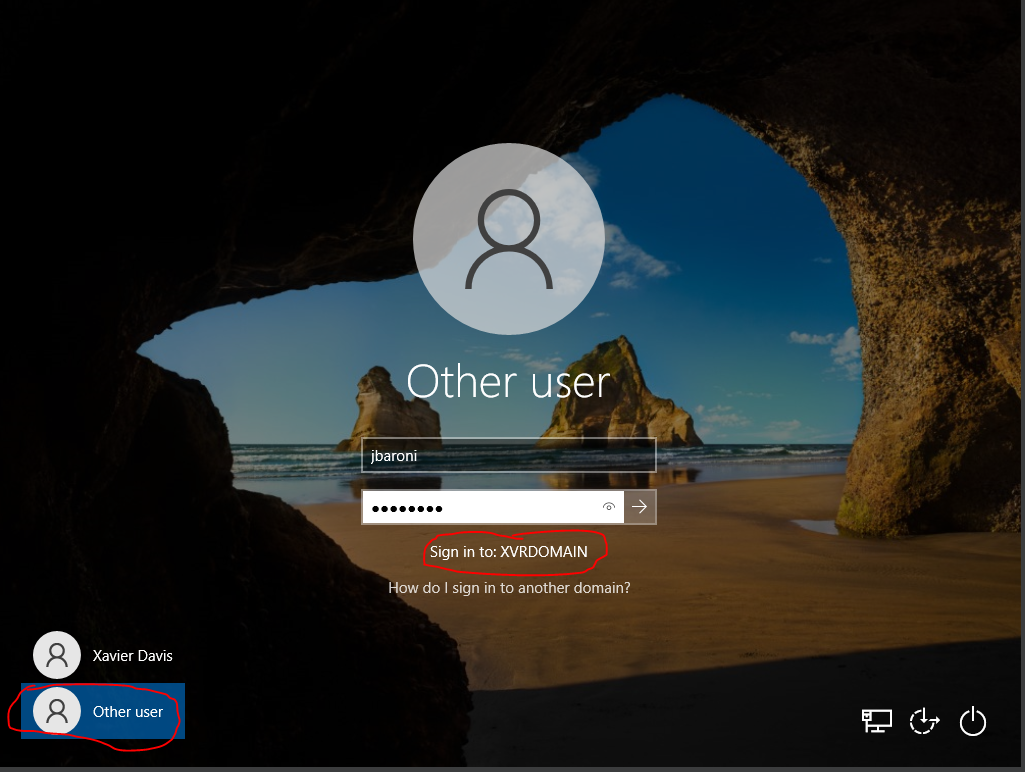
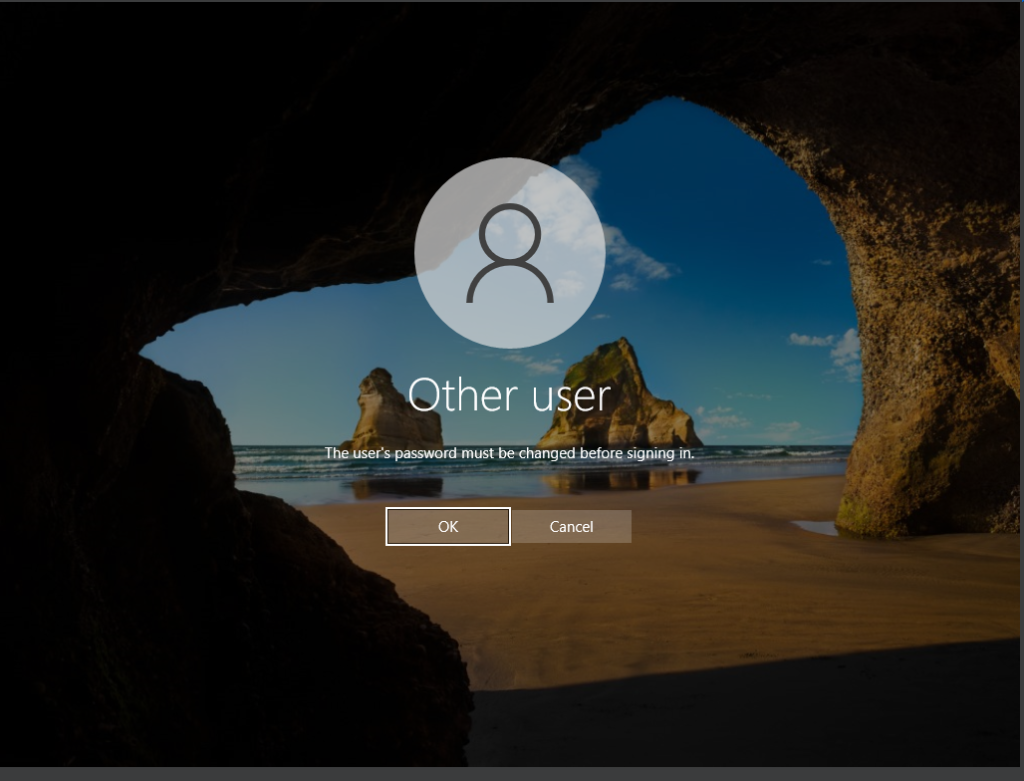
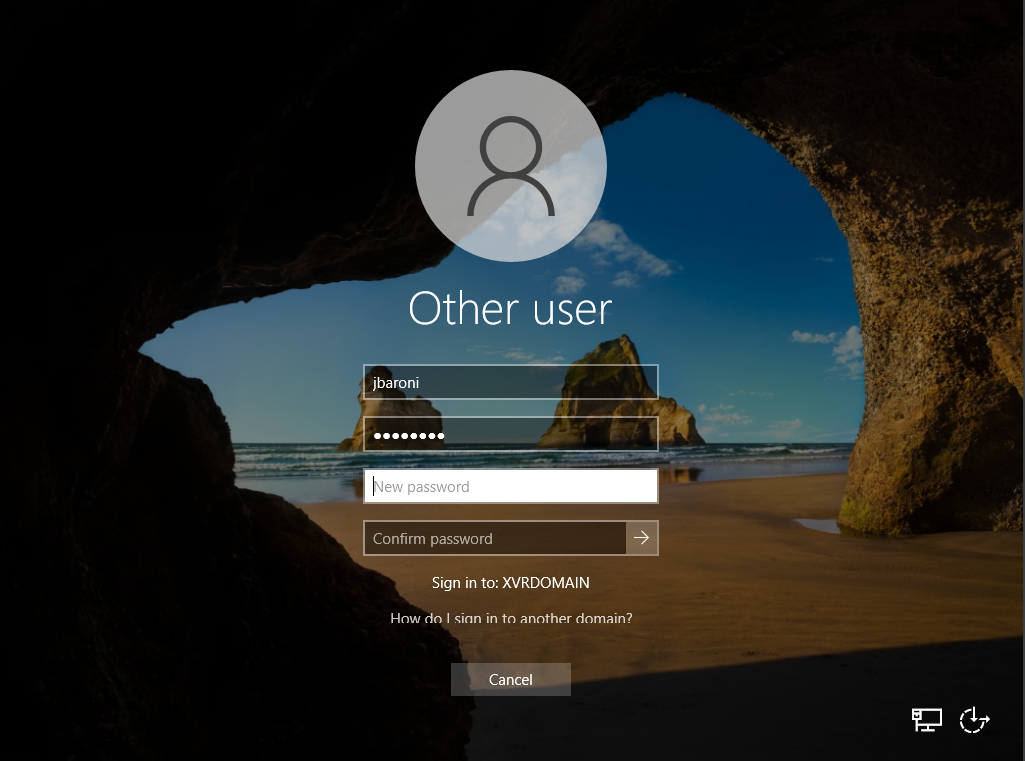
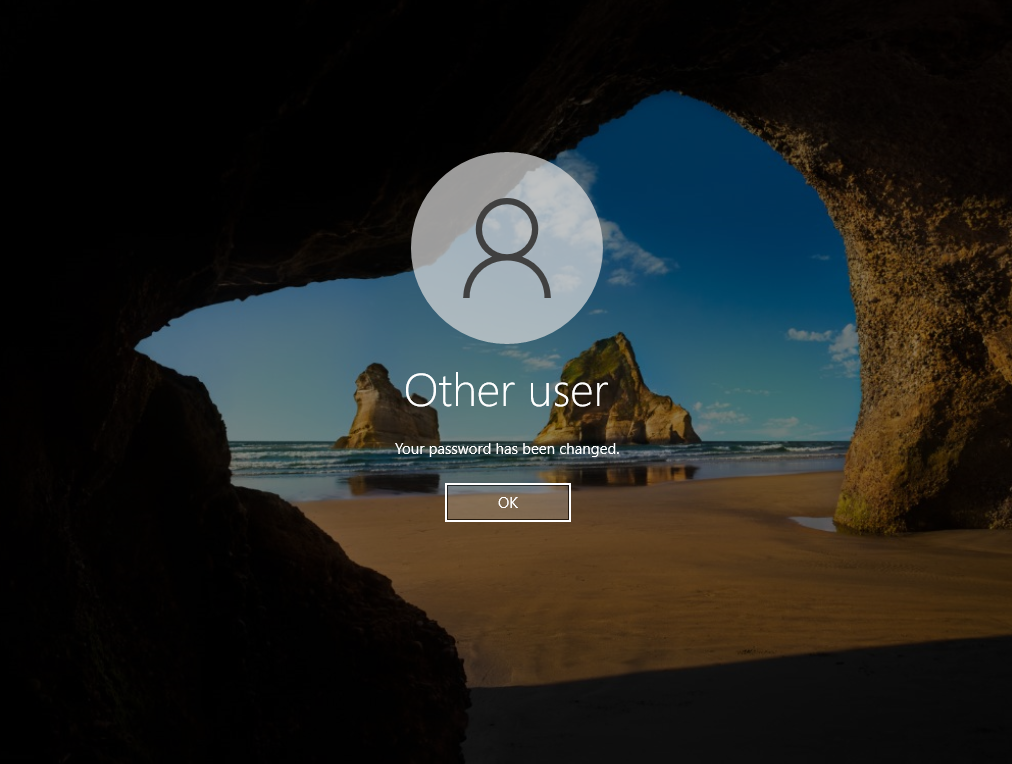
Now we have the chance to use our client computer and see if all of our user accounts work and Active Directory and our domain are all working properly! Head over to VirtualBox and startup the client computer. We are going to use the second account we created so we can see the process from the user side when logging in for the first time and having to change their password. At the login page, select other user in the bottom-left corner and enter the second users’ login information. Underneath the password input, it should say “Sign in to:DOMAINNAME” which is an indicator that we are connected to the domain. Once you attempt to login, you will be prompted to change the user password. Change it and login. We are going to learn how to reset it in a moment, so set the password to whatever you would like (you don’t even have to remember it at this point). This was just to see what the end-user experiences upon first login. The first time login for a new user will take a little bit longer so just be patient.
Resetting a Users’ Password
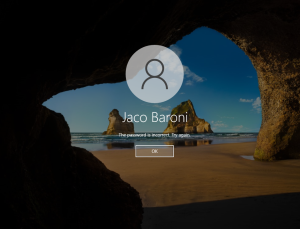
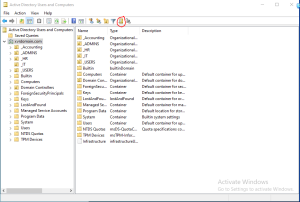
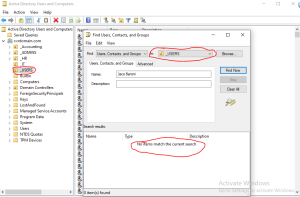
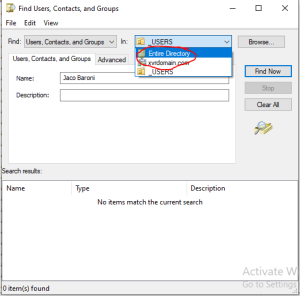
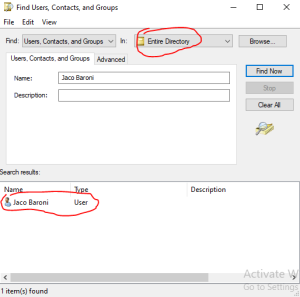
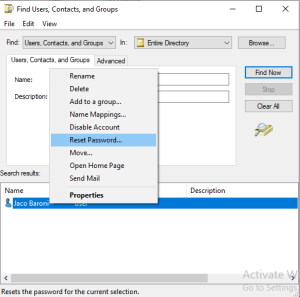
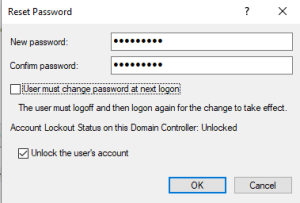
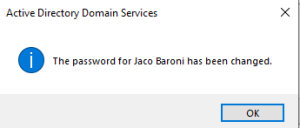
Now we can imagine a scenario where a user doesn’t remember the password they set and can’t login on their next login (a very common scenario!). Now we can take advantage of Active Directory administration and reset the users password. Its a very easy task but one that is important to be familiar with. In the first image you can see the screen the user gets when they enter the incorrect password. Before we reset the password we need to find the user account that needs to be a reset so we can practice using the find feature again. This time we will use the find icon in Active Directory Users and Computers located in the toolbar. I want to demonstrate some details of the find function as well by using the icon. When I opened it the first time you can see that I had a folder title “_USERS” selected, so when I clicked the find icon, it selected that folder to search in. In this case, the user that I’m searching for is not in that folder. Sometime we may accidentally be in the wrong directory or domain within a larger organization. To search for a user in a more/less specific folder, we can drop down the “In:” menu and select the directory that we want to search. In this case, I will select to search the entire directory and I should be able to find the user now. When you find the user, right-click and select reset password. Easy! Enter the new password and select the specifics that you prefer. I want to keep my passwords consistent so I am choosing my default password for this lab and unchecking “User must change password at next logon”. You could also unlock the user’s account here if they have been locked out by a password attempt policy. Click OK and you will get a password changed notification and the user should now be able to log in!
Final Thoughts
To sum up what we did in this lab:
- Used our help desk account to access RSAT tools (specifically Active Directory Users and Computers)
- Created 2 new user accounts and organizational units and moved those accounts to the OUs
- Enabled Advanced Features and used the find tool to search for accounts
- Found users file paths in the Object tab of User Properties
- Reset a users’ password
These are fundamental help desk tasks that are essential to know and very common in a level 1 help desk role. They are a great way to get comfortable navigating and using Active Directory and seeing how you can interact and manage accounts. In the next post, I will continue diving more into Active Directory administration and dealing with user accounts. I will cover basic Group Policy management by creating an account lockout policy. Once the policy is configured, I will violate that policy and get an account locked out and go over how to unlock the account. I hope this was helpful or you enjoyed reading this post. Thanks for following me along my IT career journey!
Leave a Reply