Skills: Windows 10, Windows Installation, VirtualBox, Account creation, CMD, ipconfig, ping, joining a domain, Active Directory
In this lab, I am installing Windows 10 to a new VM in VirtualBox and joining it to the domain we created in the previous post. This computer will function as our client computer in which we will use to login to Active Directory accounts on the domain. I will configure an internal NIC that joins to the network we already created. When joining the network, this new client should receive an IP address from the DHCP server we created in the last post and we should be able to connect to the internet. I will use a couple of CMD commands to verify the network connectivity. Before joining it to the domain, I will create/enable a local admin account that we can use to access the computer if it get disconnected from the domain. Lastly, I will join the computer to the domain and verify it has joined by logging in to the admin account created in previous posts and verifying it has been added to the domain using Server Manager.
Downloading Windows 10
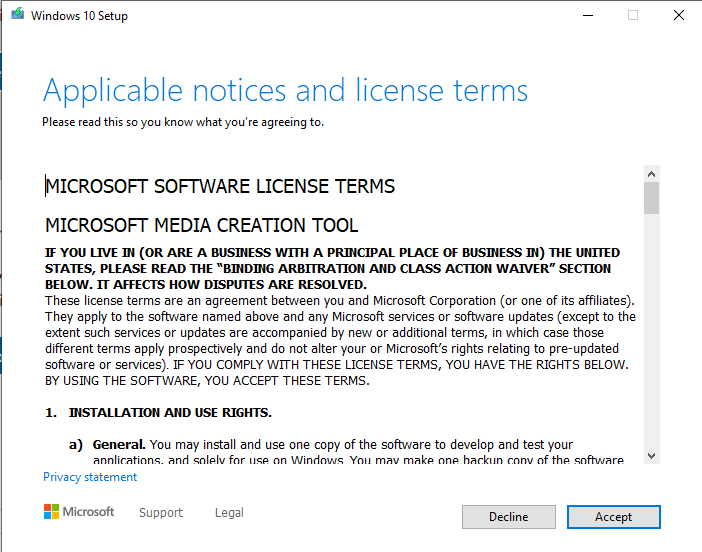
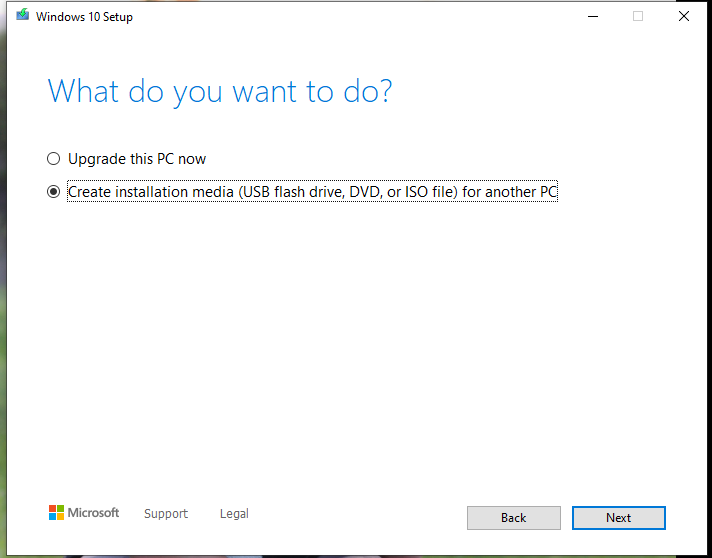
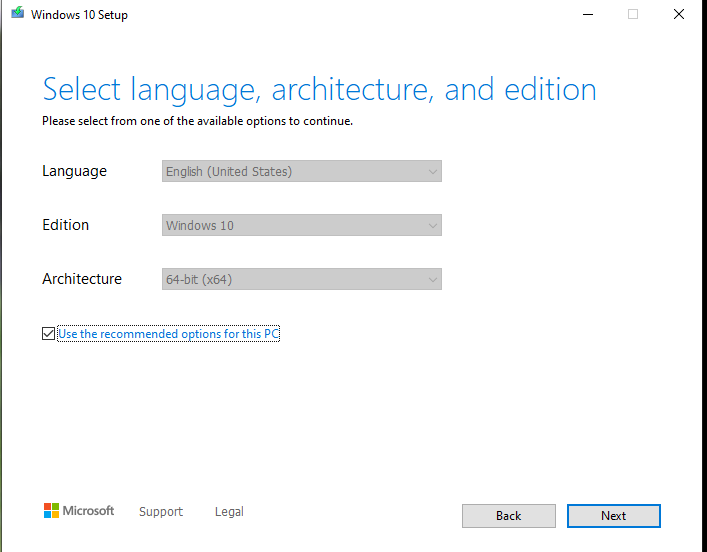
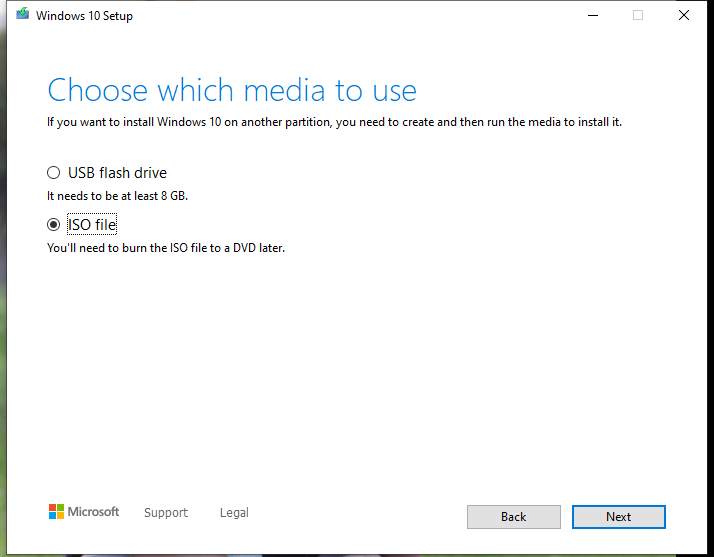
In order to install Windows 10 on the virtual machine, the Windows 10 ISO must be downloaded. To download the Windows 10 ISO, go to this link, find “Create Windows 10 installation media” and click “Download now”. Once downloaded, open the file and it will start “Windows 10 Setup”. In the setup, start by accepting the license agreement. On the next dialogue, select “Create installation media for another PC”. We want to select this instead of choosing the upgrade option since we are creating a new machine. On the next prompt, it will ask to select language, architecture, and edition. I kept the default since this is what we are trying to install. It is assumed that if you already made it this far and have installed Windows Server 2016, that you have a 64-bit CPU because it is the only option for Windows Server. Since this is being installed on a virtual machine, select ISO file on the next dialogue because we will just be pulling it form the computer we are already on. After this, it will ask where you want to save the ISO file. I personally have a separate disk that I have all of my VMs and lab files saved. Just put it somewhere easily accessible and that you will remember (like on the desktop or a new folder).

Creating the VM in VirtualBox
While the ISO is downloading, open up VirtualBox to create the new VM. In VirtualBox, start by clicking new to open the “Create Virtual Machine” dialogue. You can name the VM whatever you like, but for ease, I just name it “CLIENT1”. Like I said earlier, I have all my VMs and data on a separate hard drive so I changed the folder location, but you can just keep it as the default VirtualBox folder. Leave the ISO Image blank, we will select it when we boot the VM the first time. Select Microsoft Windows for the type and Windows 10 (64-bit) for the version and then click next. You can configure the hardware to whatever suits your computer depending on how much resources you have. My computer is pretty old and limited, so I kept everything pretty minimal. I would definitely opt for as much as you feel comfortable using to make it a better experience. When you get to the Virtual Hard Disk page, select “Create a Virtual Hard Disk Now”. Once you are done, select finish. Don’t boot it up quite yet, there are couple other things to configure before installation. Here is what I set for everything:
- Base Memory: 2048 MB
- Processors: 1 CPU
- Disk Size: 50 GB
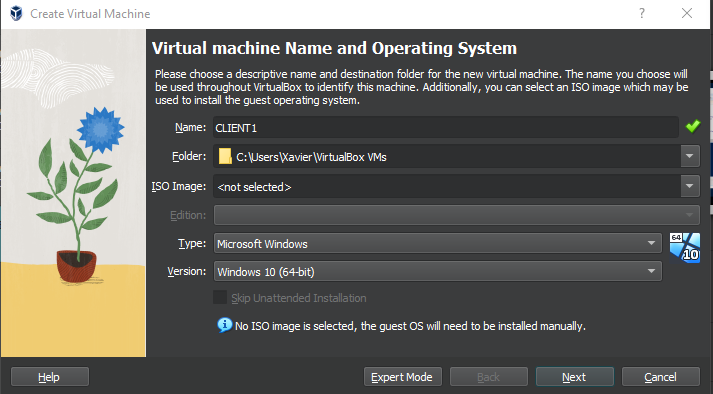
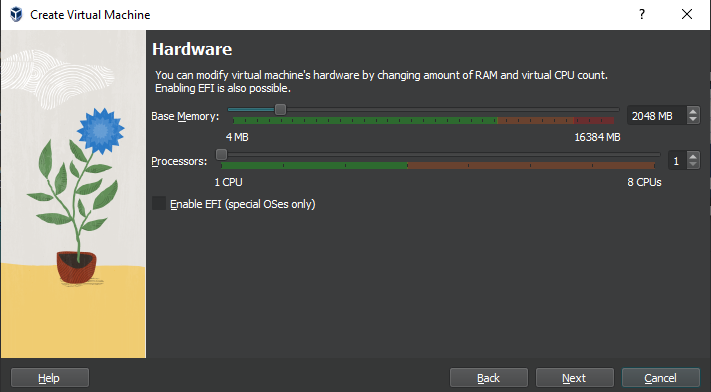
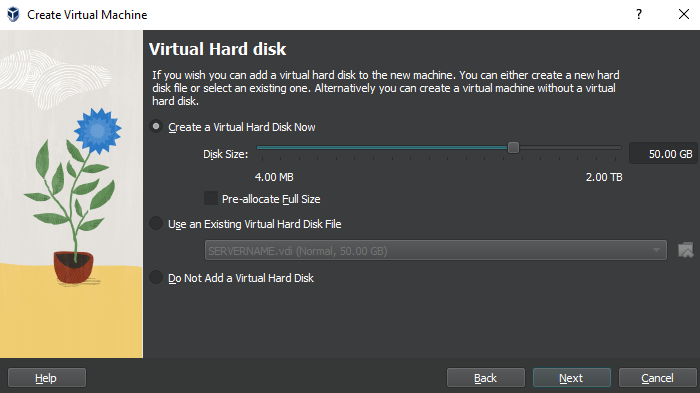
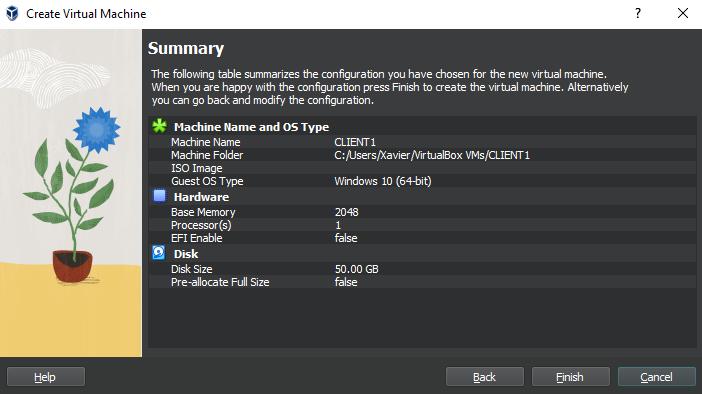
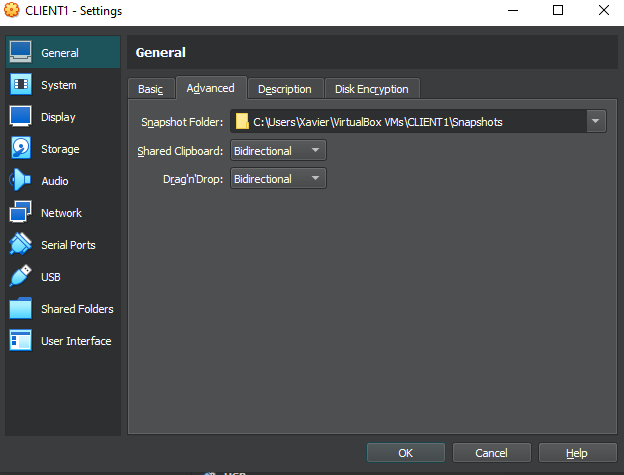
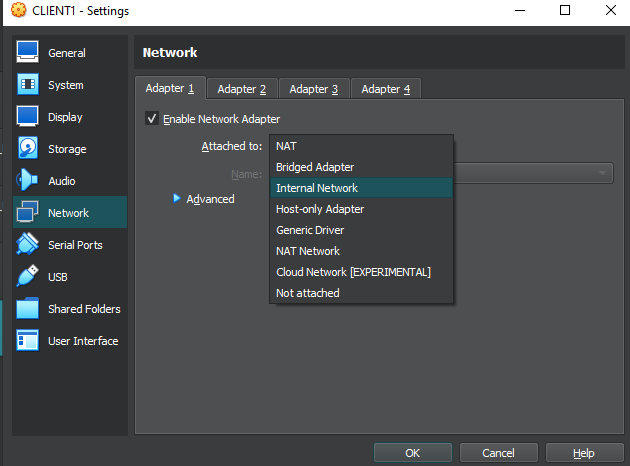
Before booting, select the VM you just created and go to settings in VirtualBox. Like we did for the Server, go to General-Advance. Select Bidirectional for both “Shared Clipboard” and “Drag’nDrop”. This will allow us to copy and drag files between the VMs and the host computer. Next, go to network and select “Internal Network” for adapter 1.
Installing Windows 10
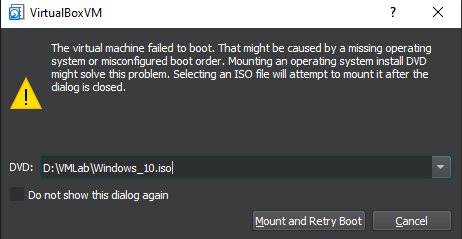
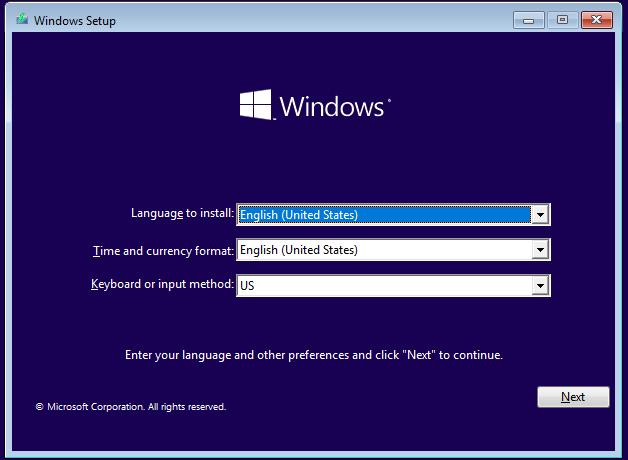
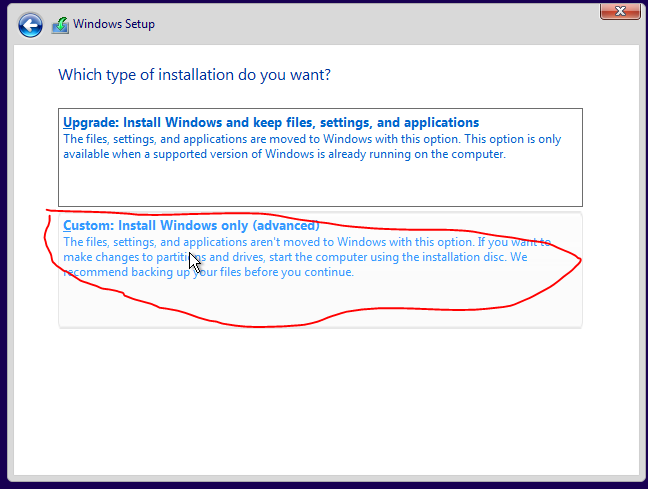
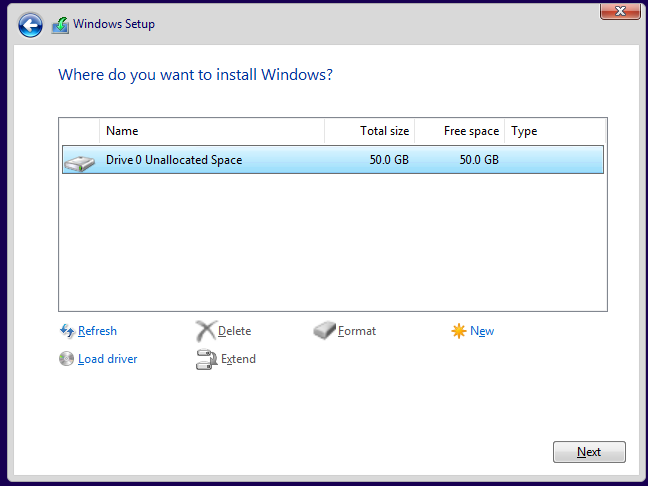
By now, the ISO file is hopefully finished downloading. If not, wait until it is completed to start the next part. To begin, go to VirtualBox, select the computer we just created, and click “Start”. The machine will give you a failed to boot error. This is where to select the ISO file that was downloaded. Select it and then click “Mount and Retry Boot”. Upon reboot, the Windows 10 installation should start. First, select the language and keyboard that suits you. Click next, and then when prompted click “Install Now”. Shortly after, Windows will ask for a product key. For this lab, I am using a limited version of Windows and don’t need any kind of personalization of any sort so I just need the bare minimum. At the bottom of the dialogue, select “I don’t have a product key”. Next, it will ask you what Windows edition you would like to install. Since we want to be able to join a domain, select Windows 10 Pro. Make sure you don’t select a home edition or else you will not be able to join a domain. Once again, accept the license and click next. On the next window it will ask which type of installation that you would like to use. Since it is a new machine and we are not upgrading an already existing system, select the custom option. Finally, select the hard drive that was created for this machine and click next. The installation will start after that. It does take a pretty decent amount of time so this would be a good time to take a break.
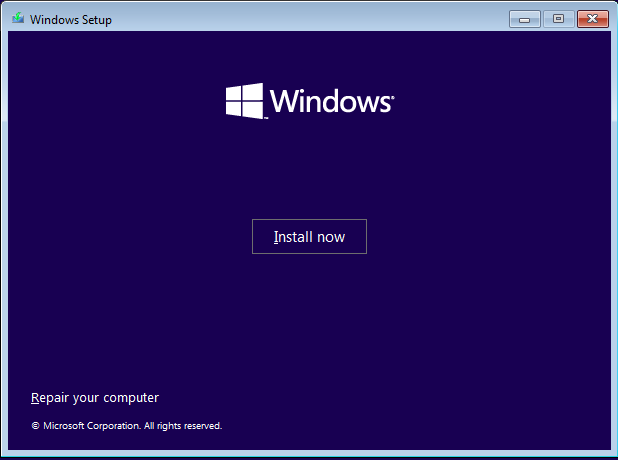
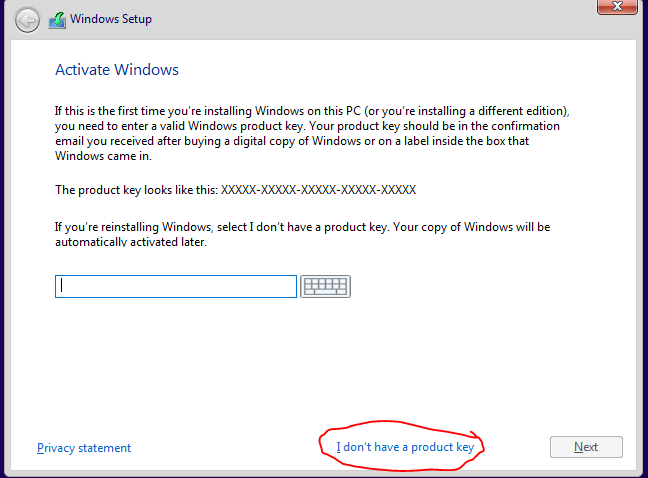
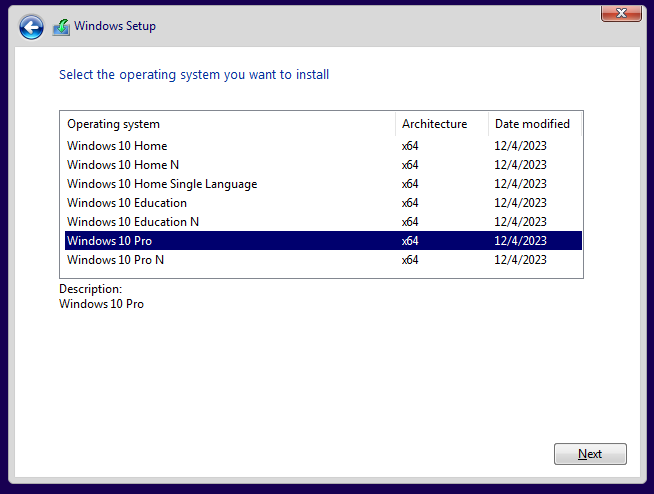
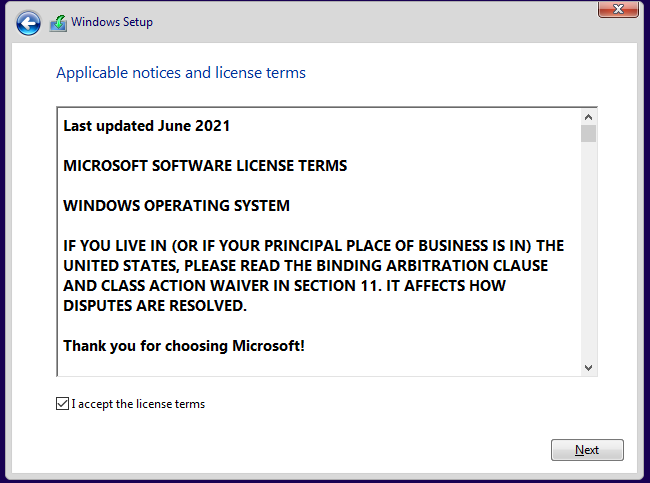
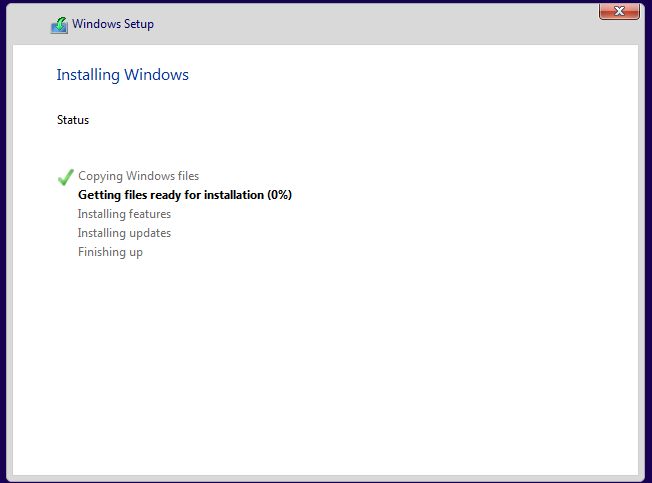
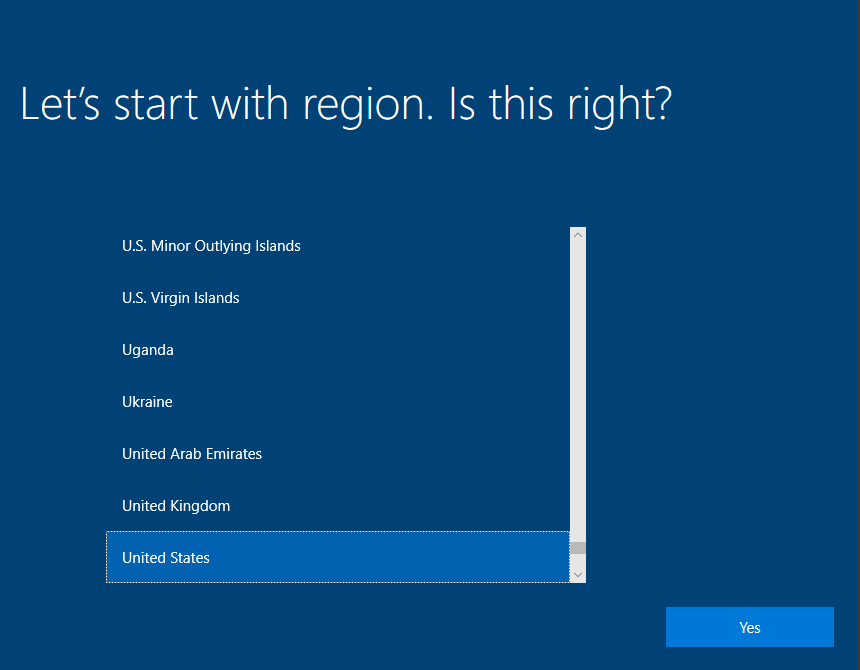
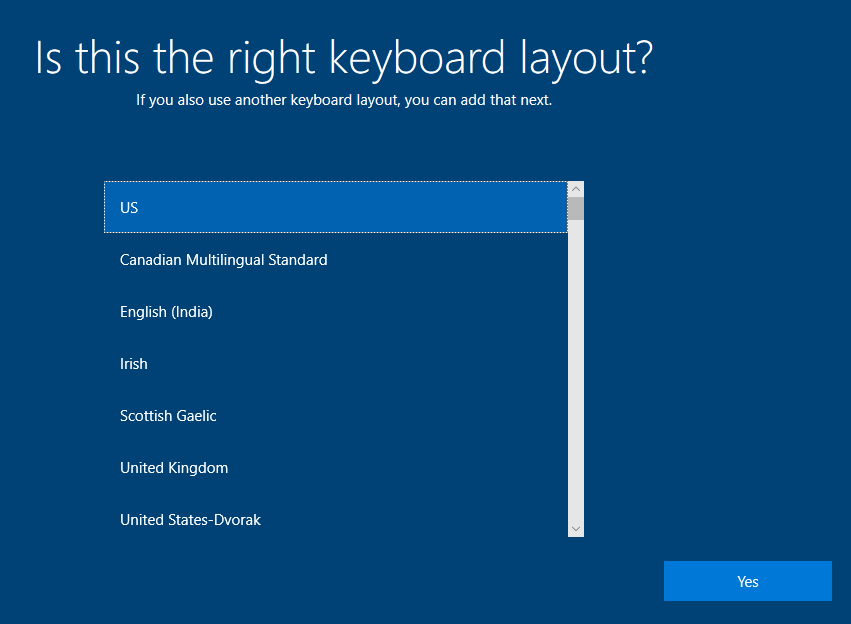
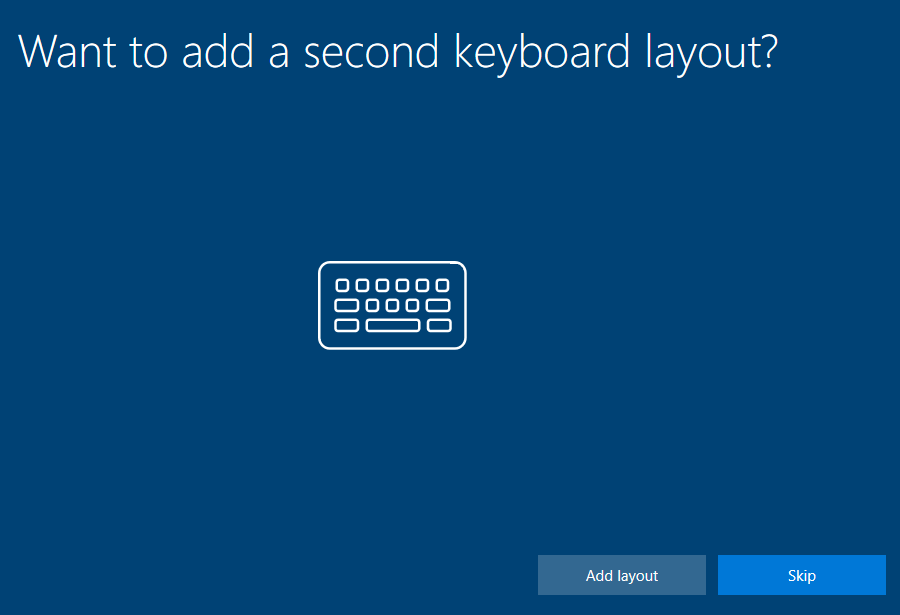
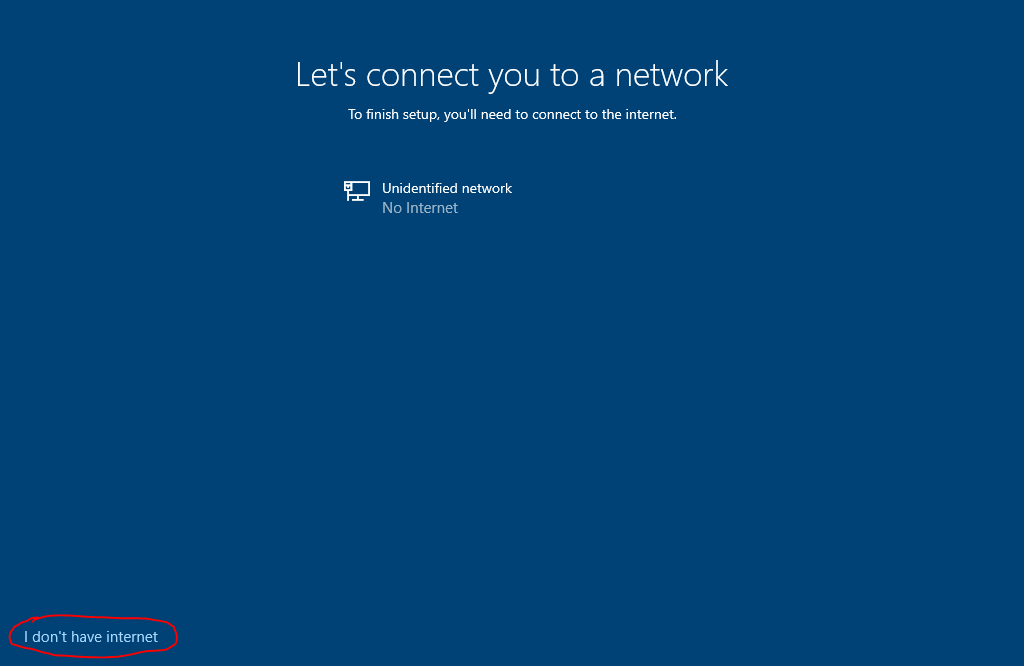
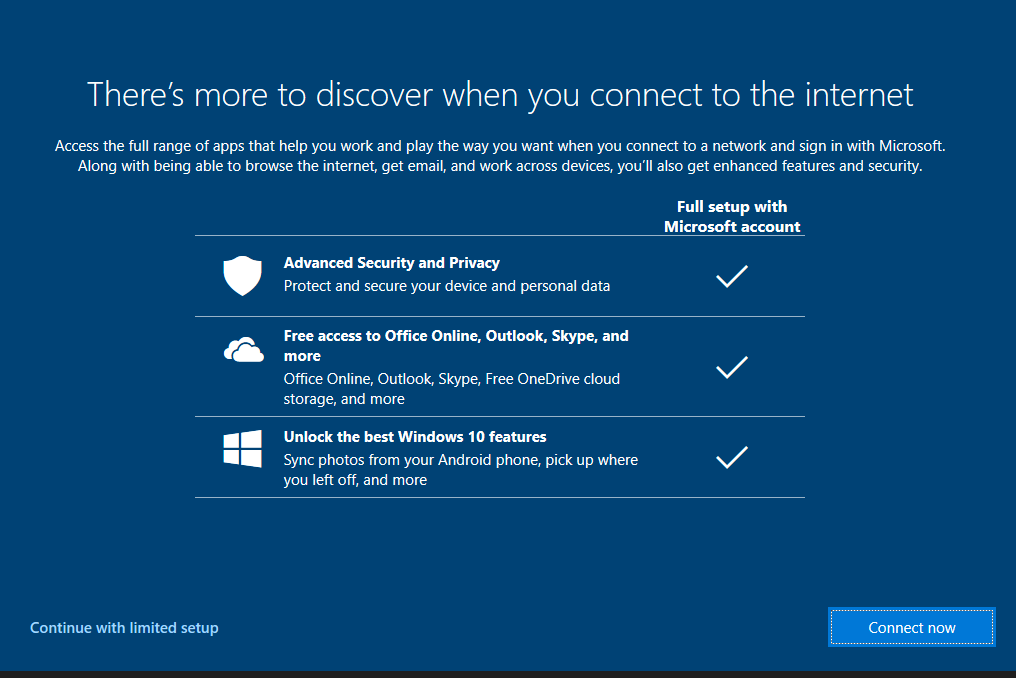
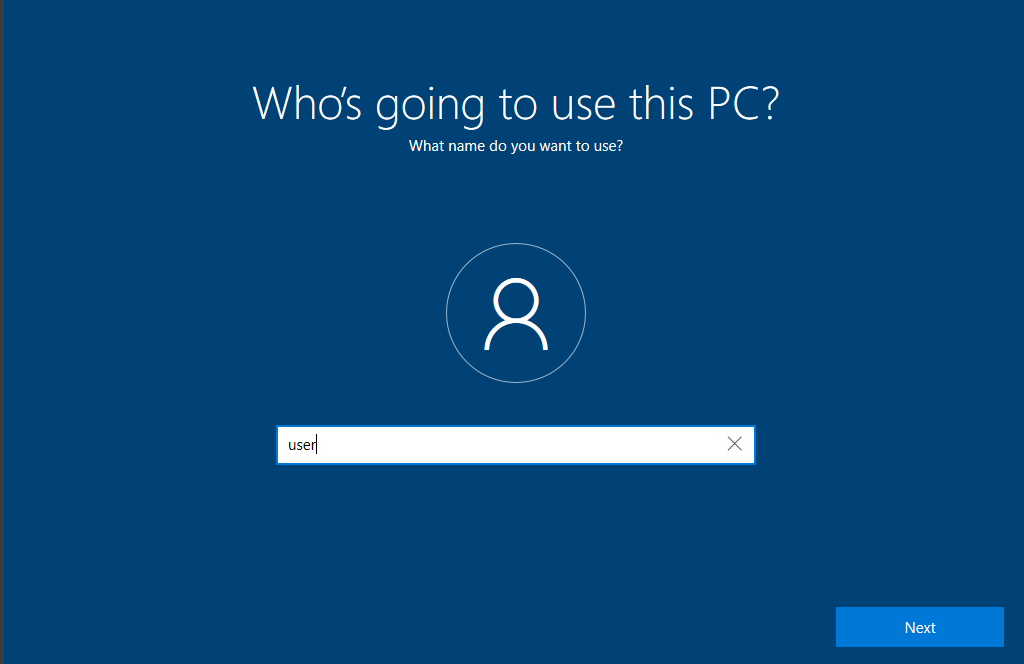
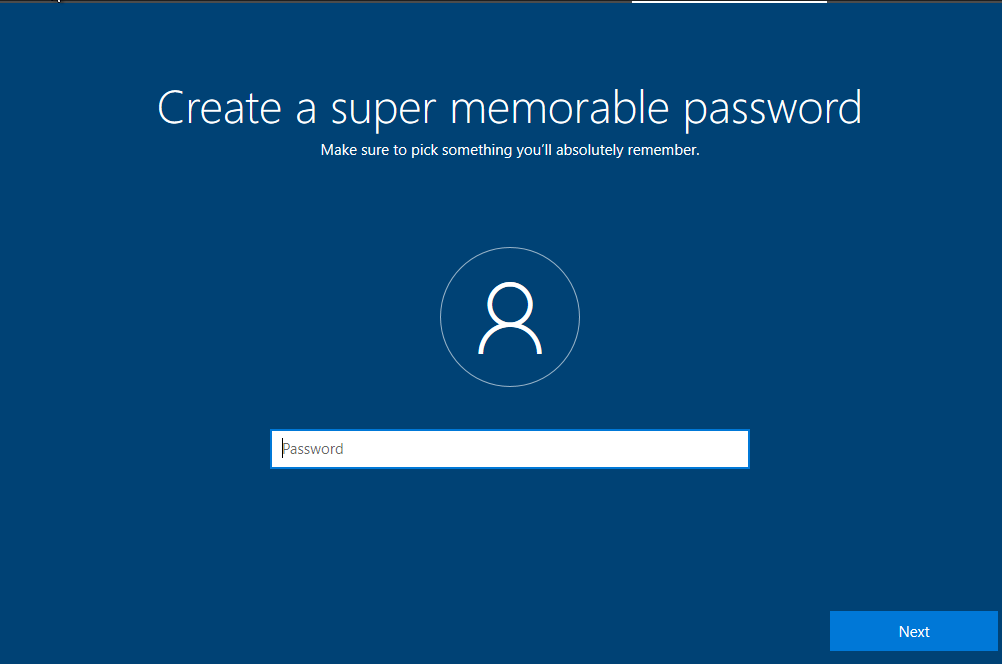
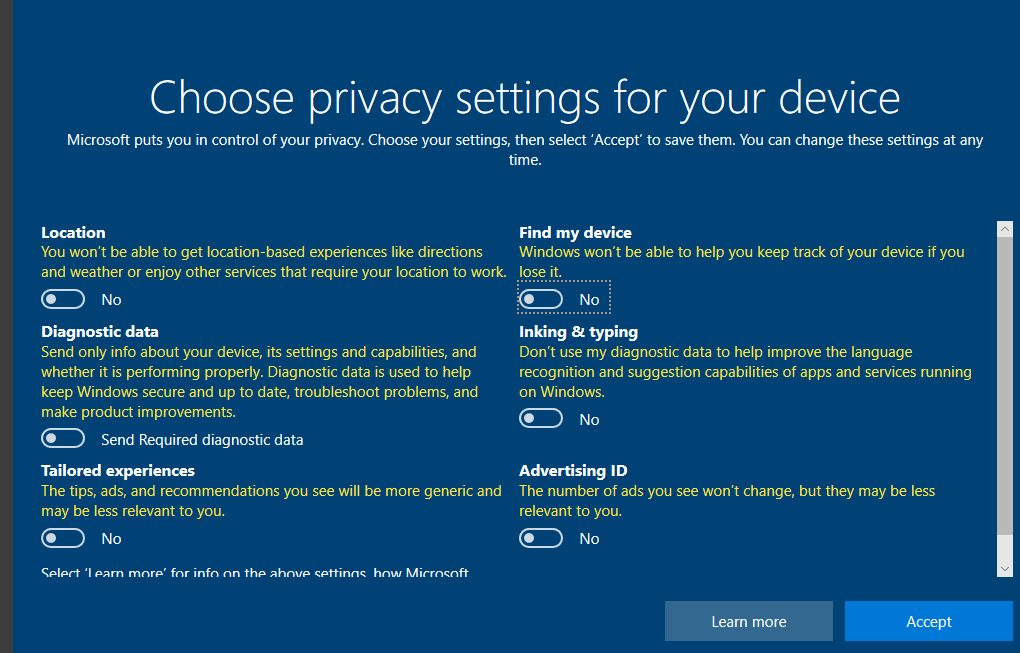
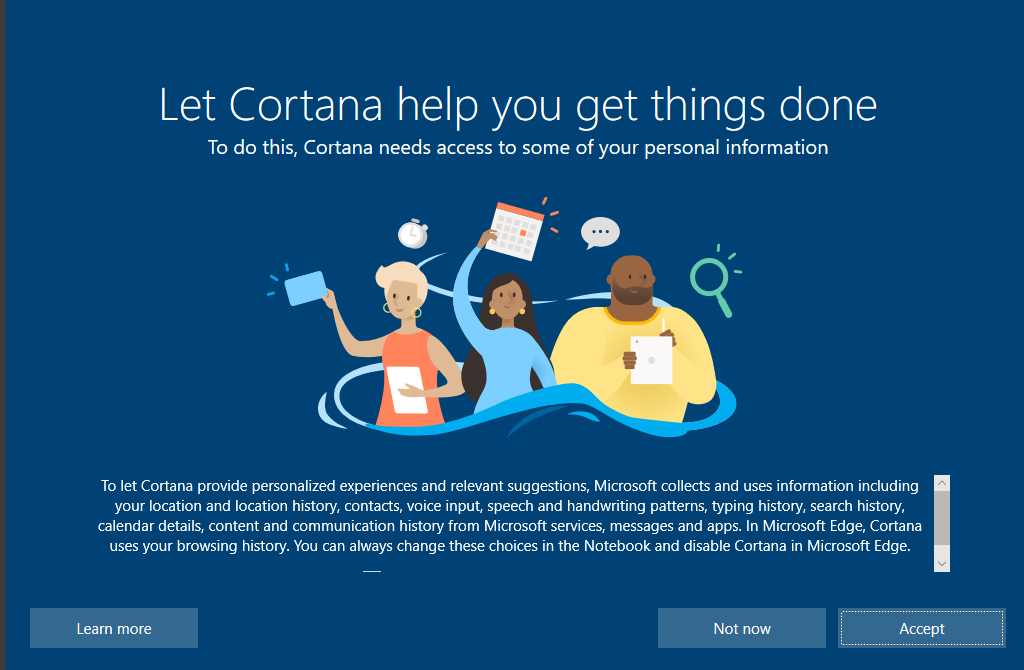
Once the installation is finished, there are a few more steps to complete to get Windows up and running. You can customize this to however you like, but for home labbing purposes, I kept everything very minimal and basic. Select your region and keyboard layout. When prompted to connect to your network, select “I don’t have internet”. If the configurations are correct from the previous post, the computer should automatically connect to the internal network we set up. For the next step, it will ask you if you would like to set up some additional Windows tools and apps. For the purpose of the lab select “Continue with limited setup”. For now, I just entered “user” for the account name and continued with no password. I did this because we are going to immediately create a local admin account for this computer that we can use in case the computer ever gets disconnected from Active Directory and we need to troubleshoot locally. Lastly, select your privacy settings (I turned everything off here; you can go back later and enable any of these features later if you would like) and skip Cortana, unless you really want that feature. After this we should be logged into our desktop and ready to go and start using this client computer.
Verify network connectivity to internet and server
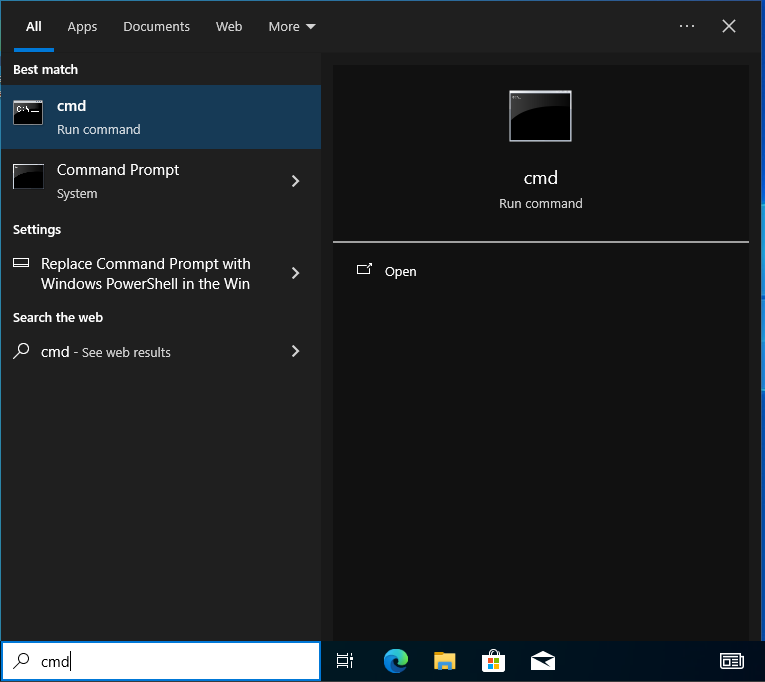
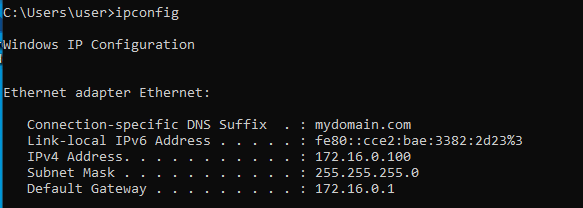
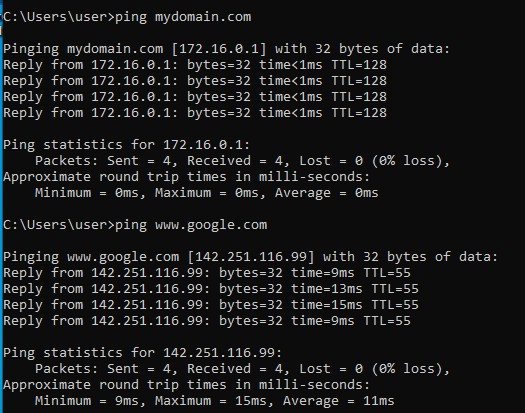
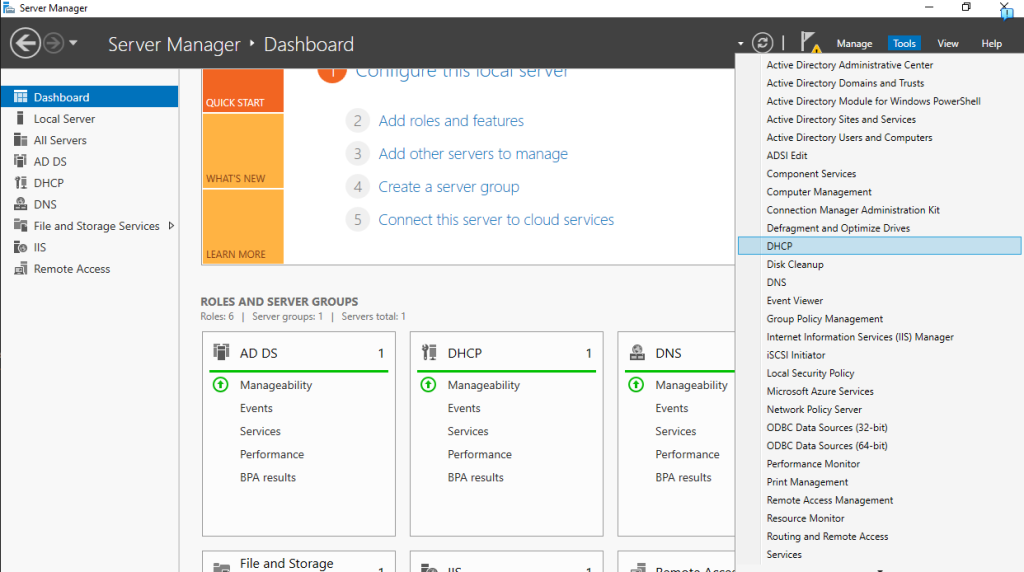
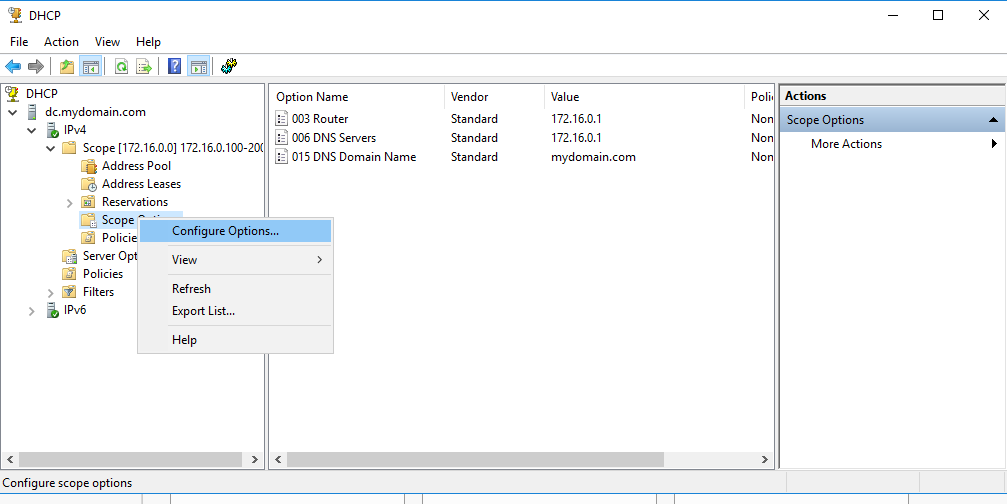
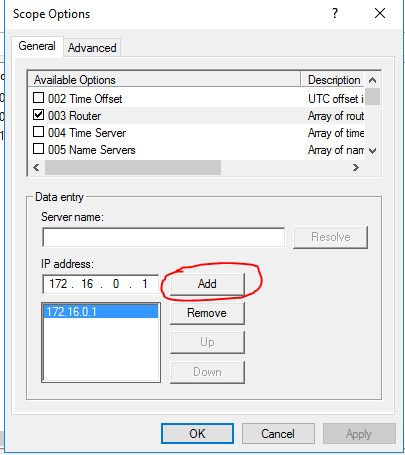
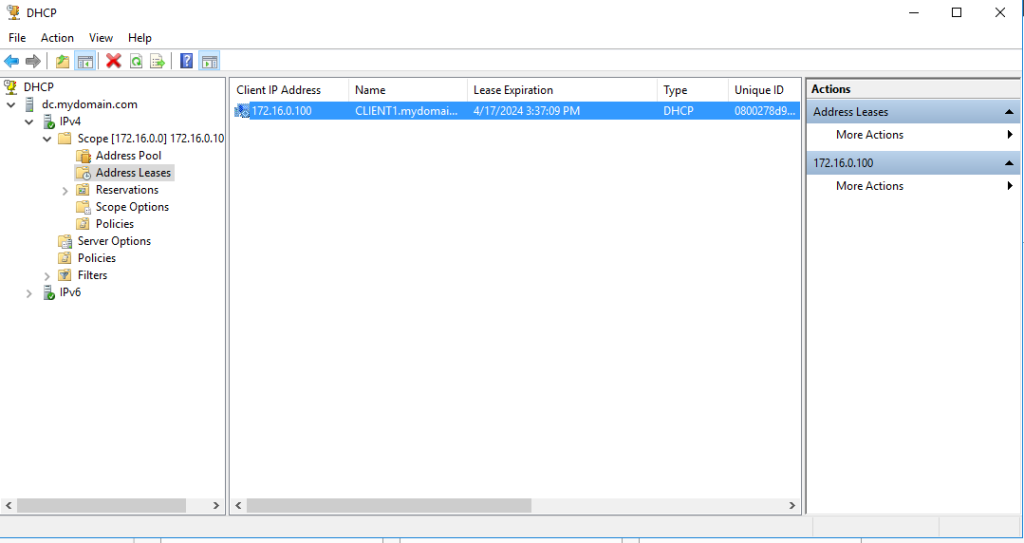
Once everything is loaded up, we can verify the network connection that we setup. I had to troubleshoot a little here because of a mistake I made earlier. To test the connection, we need to open the command prompt and run a couple of commands. In the bottom left of the screen, type “cmd” in the search bar and open the command prompt. When the command prompt is open, run the command “ipconfig” and we should see the IP configuration that we set in the last post. You should see that the client is connected to “mydomain.com” and should have an IP address from the scope that was configured, and it should be connected to the default gateway. Next we can run a couple of ping commands to see if we can get a response. I sent a ping request to the domain and to a website on the internet to test both the connection to the server and to test internet connectivity. Run two separate commands, the first is “ping mydomain.com” and the second “ping www.google.com”. Hopefully you get a response from both. In my case, when I ran the ping command, I wasn’t getting a response from google. So I knew I was connected to the domain but didn’t have internet access. After looking around a little, I found from the ipconfig command that the default gateway address that I entered was one digit off so I had to go back and fix that. I had to go back to the server, and from Server Manager access the DHCP tool. Once in DHCP, I had to go back to scope options and configure. In scope options, I had to select the router and enter the correct IP address of the default gateway and remove the incorrect one. To verify on the server end, you can go to Server Manager and select Tools-DHCP. Drop-down the scope we created and select address leases. You should now see the new computer and its IP address added to the current leases.

Creating a local admin account
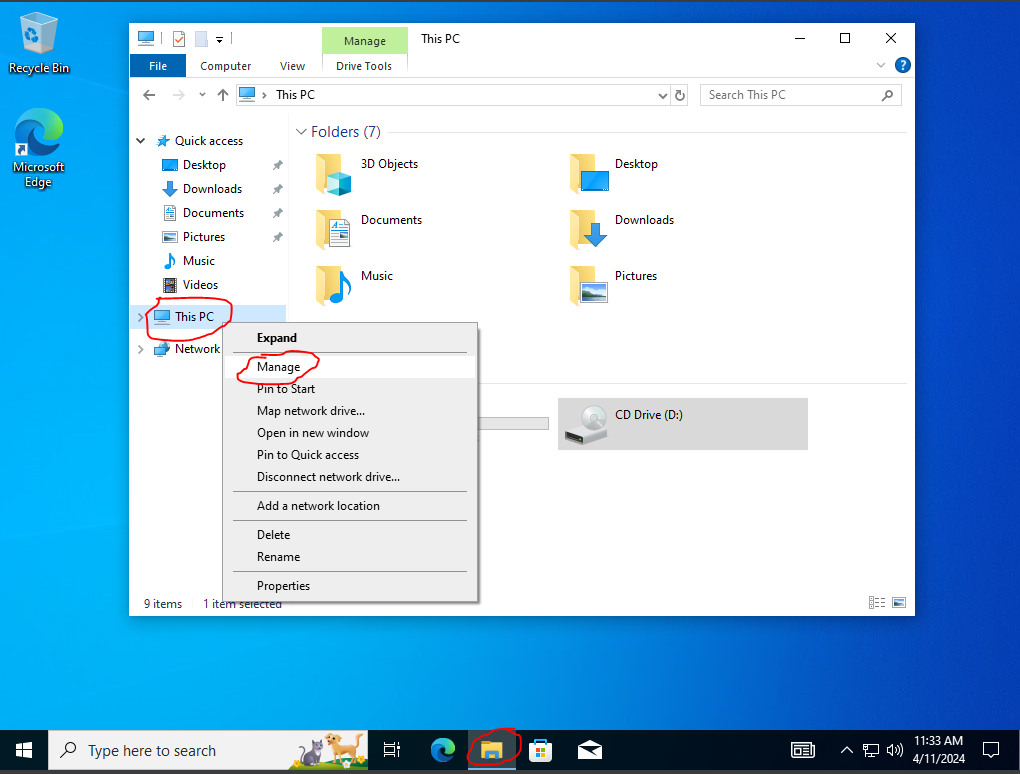
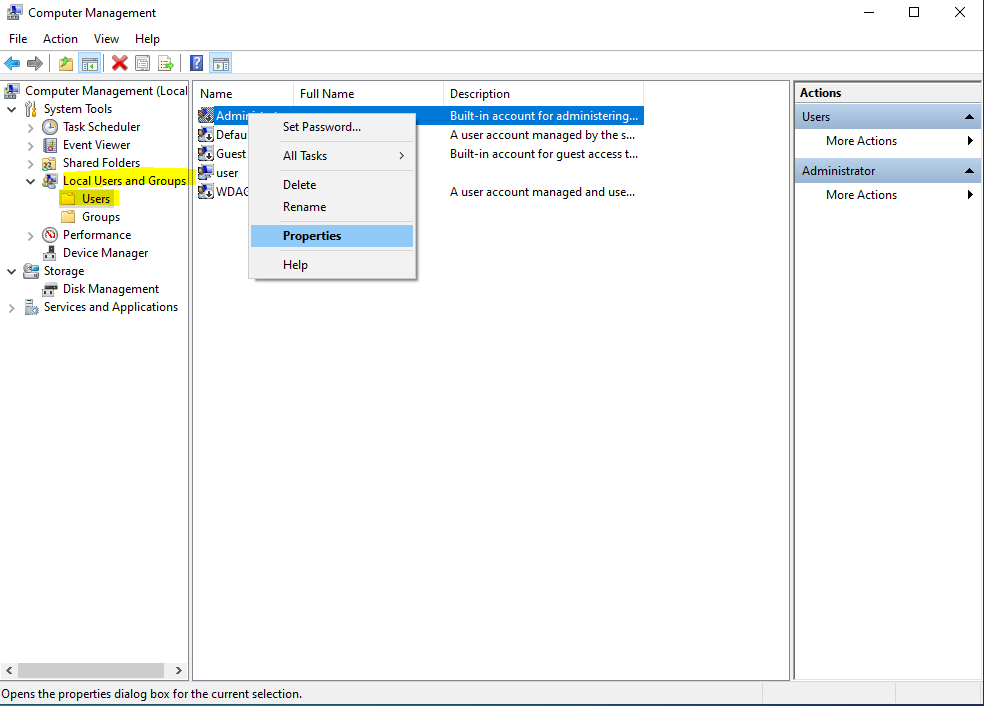
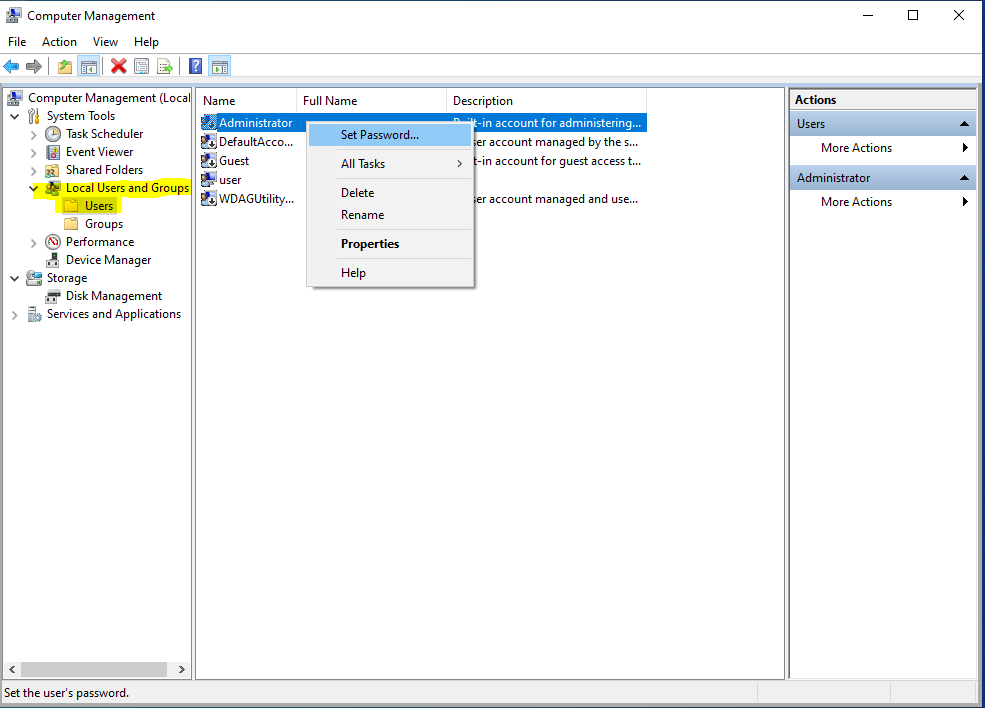
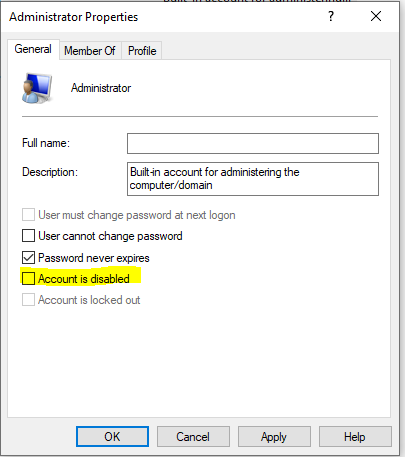
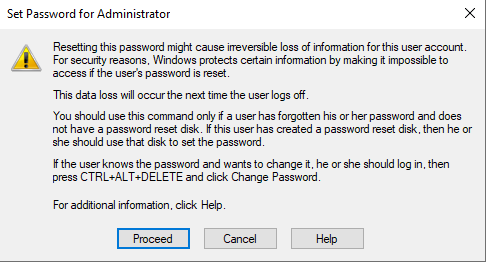
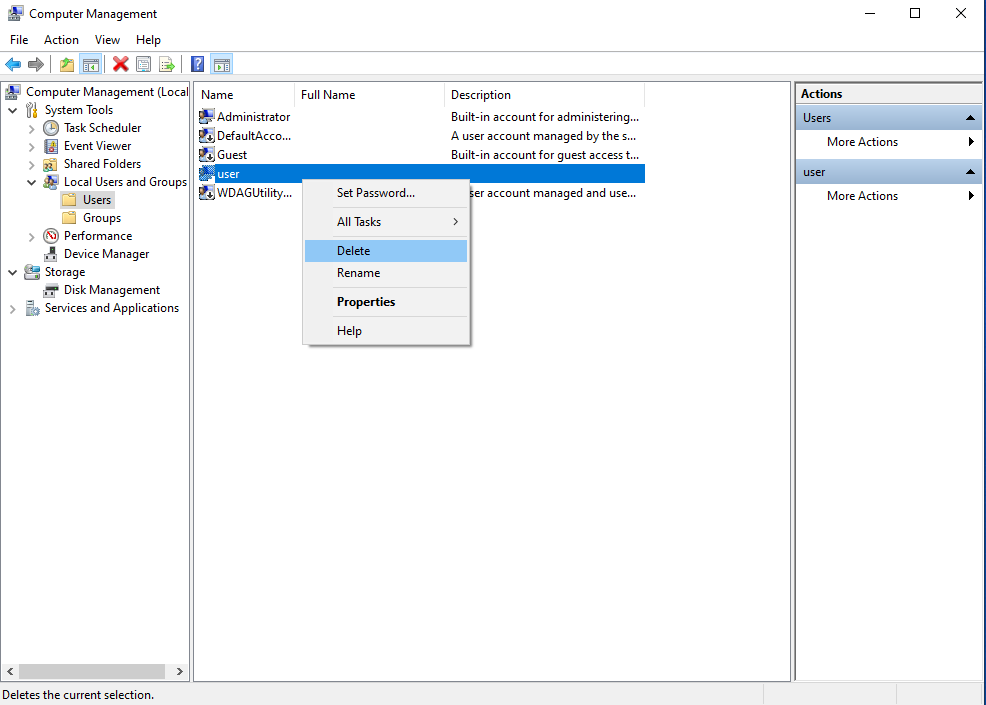
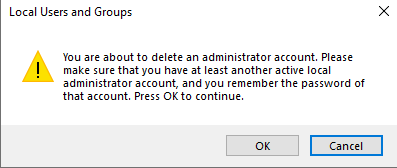
To create a local admin account, open the file explorer, right click “This PC” and select manage. Once in side Computer Management, open the Local Users and Groups drop-down and select the “Users” tab. Once in the Users folder,right click the Administrator account and select “Set password” and set a password. When the warning comes up, select proceed. Next, right click on the Administrator account and select Properties. Uncheck the box that says “Account is disabled” and click apply and OK. Once the account is enabled, log out of the current account and log back in to the Administrator account. Once logged in, we can go back and delete the default account we created. Go back to the same place we were just in to enable the account and once there, right click on the “user” account, right-click, select delete, and confirm the account deletion. Now we have a local admin account we can use to troubleshoot if we get disconnected from Active Directory and need to still access the computer.
Rename the PC and join the Domain
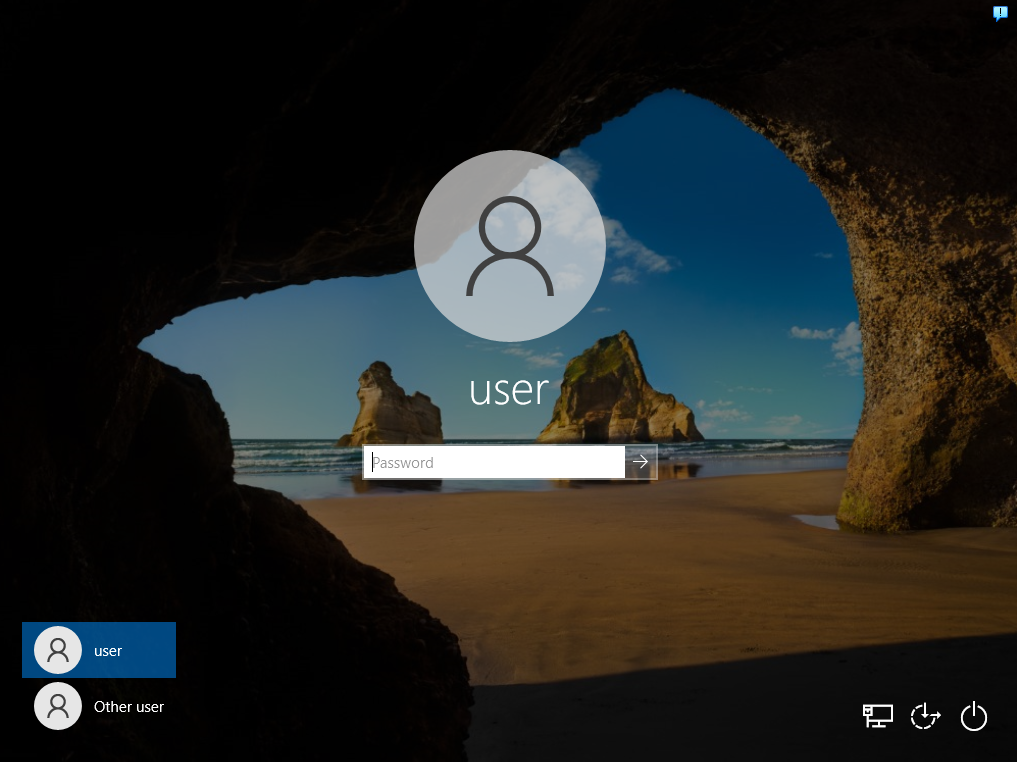
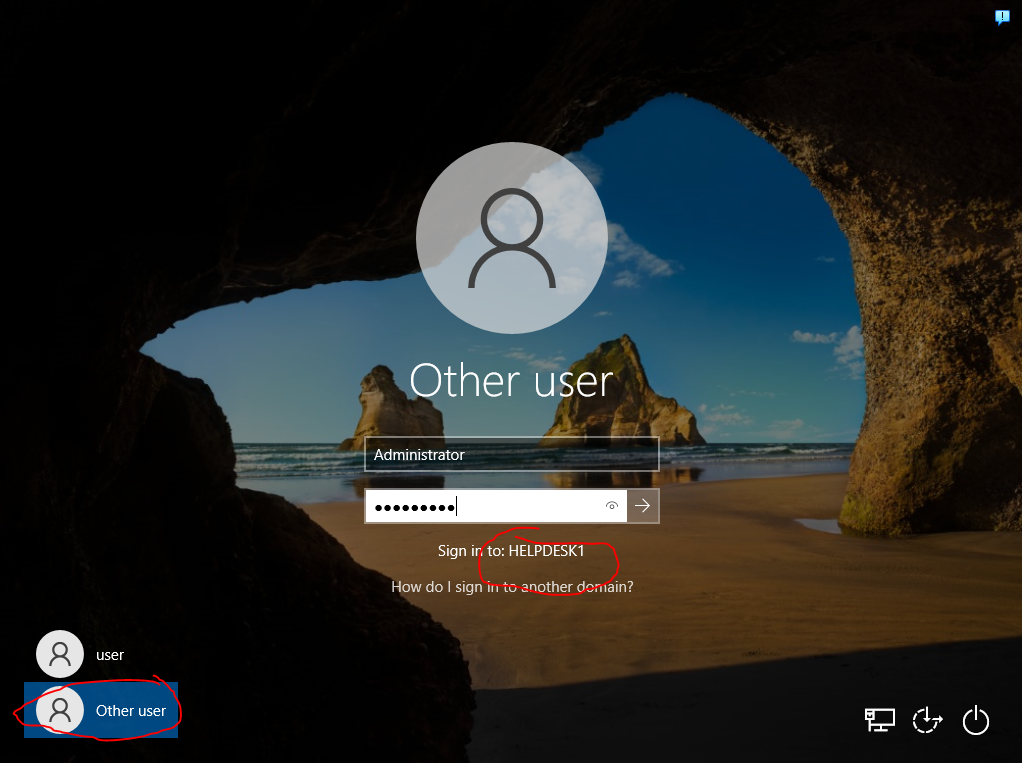
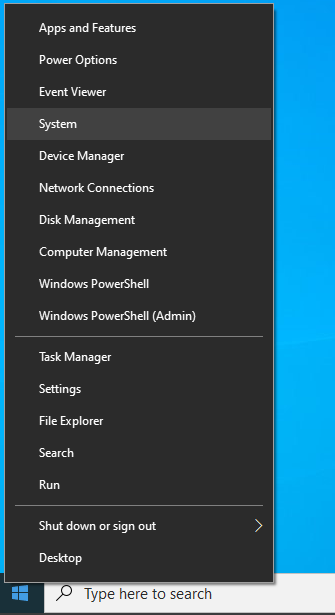
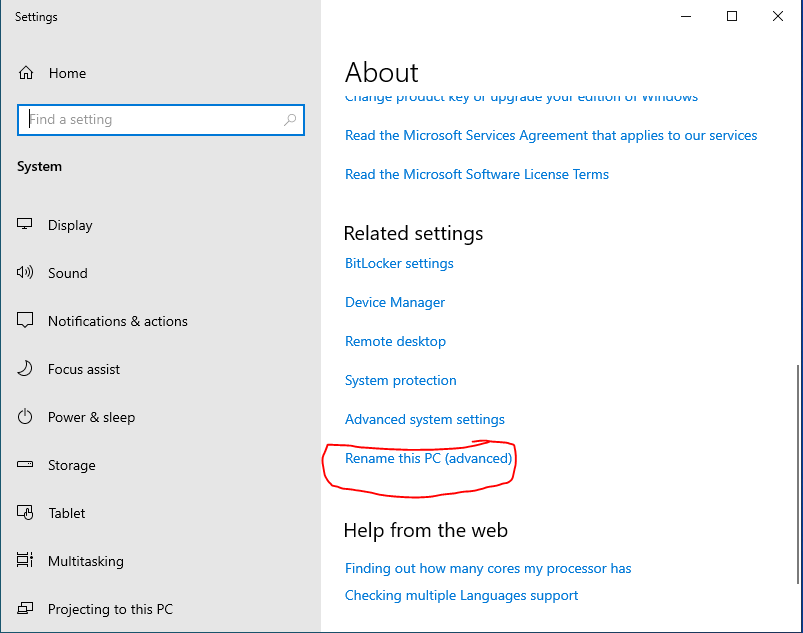
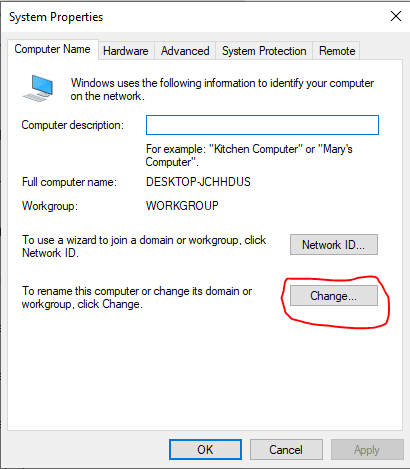
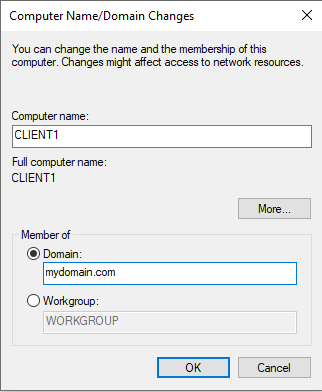
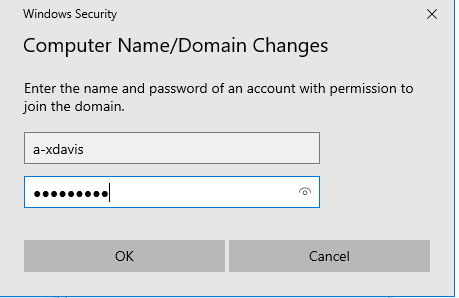
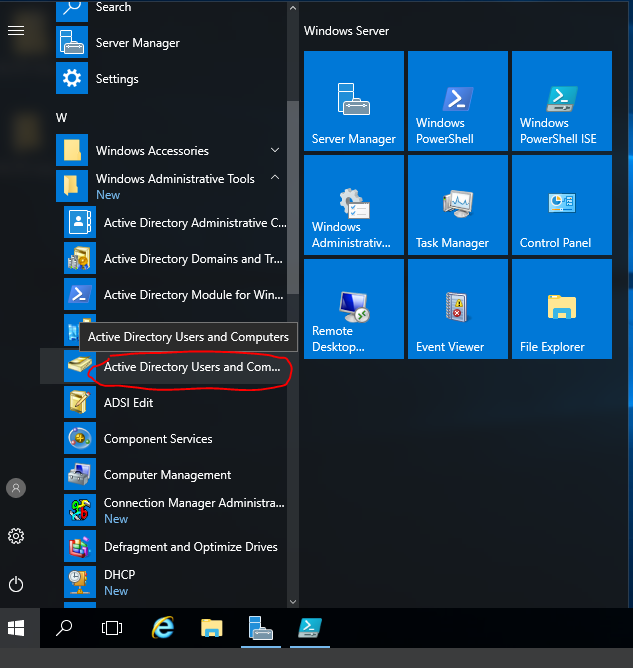
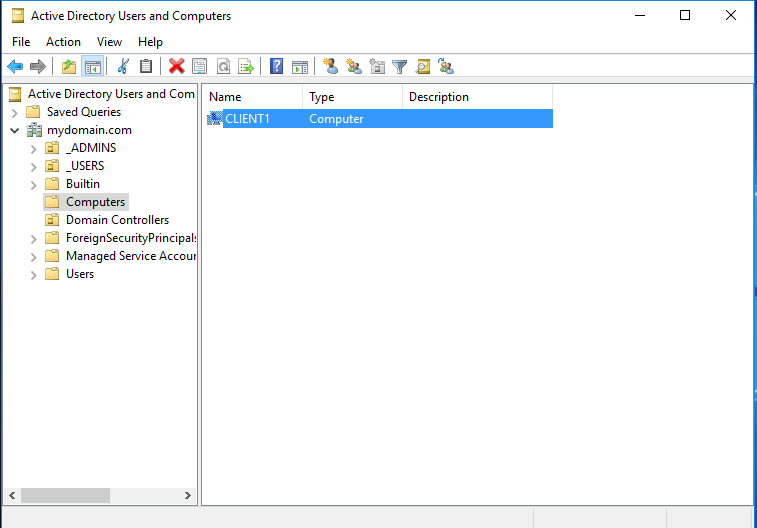
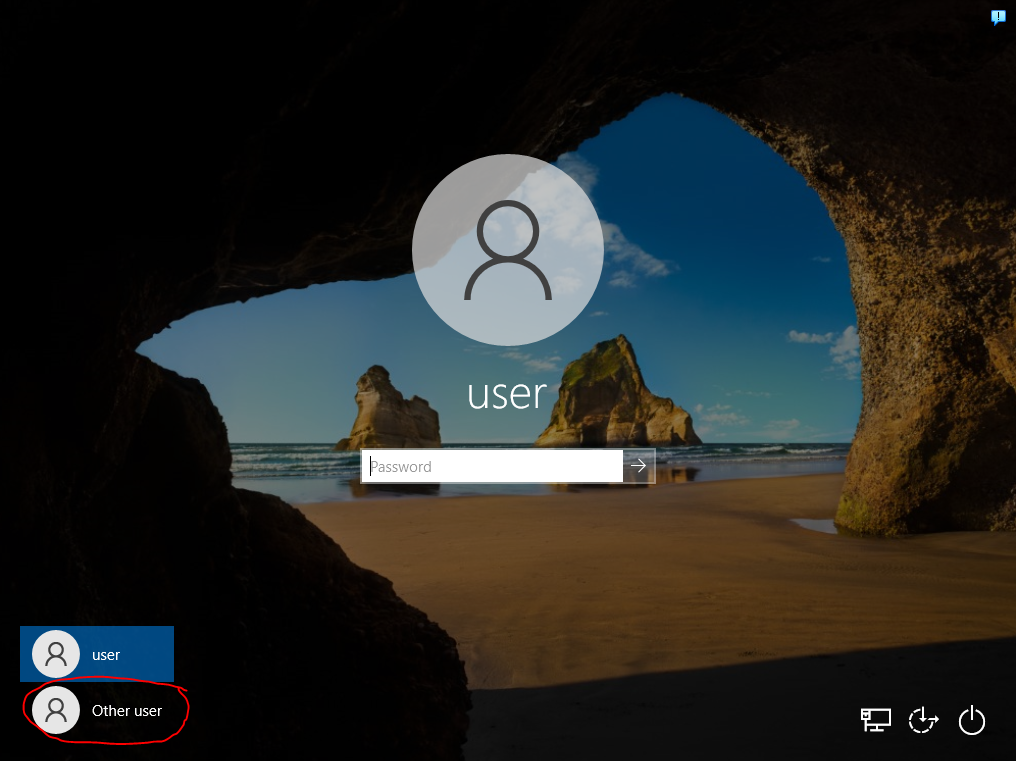
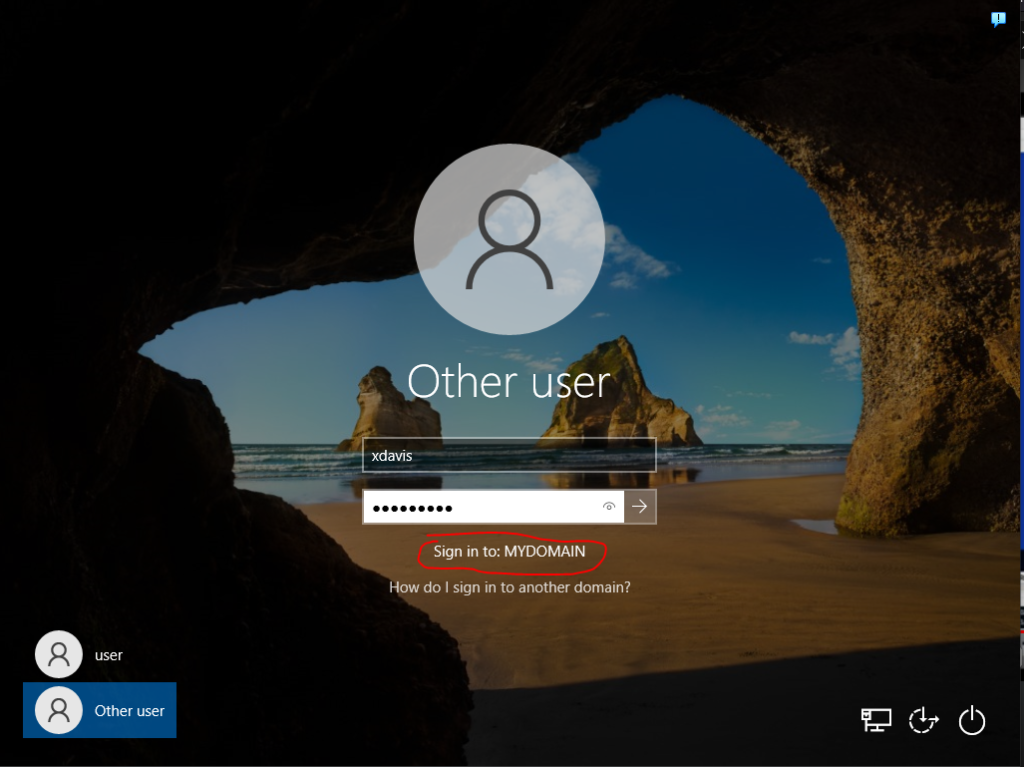
The last thing we are going to do in this post is join the PC to the domain and login to a domain account. Start by right-clicking the start menu and selecting “System”. This will open the Windows Settings-About. Scroll down to the bottom and under Related Settings select “Rename this PC (advanced)”. This will open up the System Properties menu. To change the name and join the domain, select “Change…” next to “To rename this computer or change its domain or workgroup”. I gave the computer a very generic name of “CLIENT1” to make it easily identifiable. Under “Member of”, select domain, and enter the domain address (mydomain.com). and click OK. We will have to enter admin credentials from our domain to allow the computer to join the domain. For me, the account was “a-xdavis” and the password was “Password1”. The computer should be prompted to automatically restart after entering the credentials. While the computer is rebooting, we can head back to the server and verify that the computer was added to the domain. Form the server, open the start menu and find “Active Directory Users and Computers” and open it. Once inside, drop-down “mydomain.com” and select computers. We should now see “CLIENT1” as a computer added to the domain. Once the computer is restarted, we can now login to the domain. To login to a domain account, select “Other User”. To verify that you are logging in to the domain, you should see “Sing in to: MYDOMAIN” underneath where you enter the account information. Choose a user that you created and enter the username and password and you should be able to login to the domain!
Final notes
To summarize what we just did:
- Download Windows 10 ISO
- Created a new client PC in VirtualBox
- Installed Windows 10
- Verified network connectivity
- Created a local Admin account
- Renamed the PC and joined to a domain
Once I finished this setup, I returned to following Kevtech’s videos to learn some more about Active Directory. I like the initial setup from Josh Madakore’s videos because of the network setup. To prepare for the next post, I created an additional computer that is used to function as the IT team’s computer or the “helpdesk” computer. To do this, I followed the exact same steps from this post but named the computer “HELPDESK” instead. This gives us a server, a client computer, and a helpdesk computer. There are some additional things that I did to the help desk computer to allow for administration that I will cover in the next post. Essentially, I created a helpdesk account in Active Directory with administrative permissions and added some tools to the computer that allow administration from the help desk computer. Hope this was helpful and you continue to see my journey learning IT!
Leave a Reply